How to Unify All Your Customer Data in One Customer 360 Dashboard That Measures KPIs across Your Org
Making the right marketing, sales, and support decisions requires having access to up-to-date data from across your organization. Now, with low-code platforms like Appsmith, you can consolidate all of your data from different sales, CMS, and support tools into one application without overhauling your entire business infrastructure.
This article explains how we used Appsmith to unify our customer data to improve our business outcomes and provides you with the information, tools, and templates to do the same.
Building tools to make your organization data-driven and proactive
Before we built our Customer 360 application to provide a full view of our customers' interactions, we responded to many issues in our business reactively rather than proactively. This was because our tools did not integrate well, leaving gaps that could only be identified by manually looking up data. As this wasn't a real-time process, the KPIs we needed to make good decisions were sometimes outdated or missing, negatively affecting our customer support and sales outcomes.
There is no single off-the-shelf tool that can handle every one of our use cases — Appsmith is a large organization and each team has different requirements for the tools they use to interact with customers. While there are tools that try to do everything (for example, providing sales, support, and CMS functionality in one commercial package), we have found that they tend to do many things okay, but nothing well.
The solution was to use several different tools that are world-class in their specific domains and combine them together into a single customer view dashboard within our Customer 360 application. This approach ensures we have a unified view of our business, enabling us to make the right decisions at all times.
Previously, we covered the journey that we went through to build our own Customer 360 app for the Appsmith organization. Below, we show how we actually built our dashboard, giving you a framework to build your own internal customer tools.
How to bring all of your customer data into one app that your whole organization can use
To build your own Customer 360 app, sign up for the free, cloud-hosted version of Appsmith, fork our community template (helpfully provided by our own customer support team so that you can get up and running as fast as possible) with basic authentication for the datasources, and follow the steps below to tailor it for your own use.
Step 1: Identify and map your requirements
The first step is to get a clear picture of exactly what data you want to consolidate. Thinking through the following questions can help significantly with the planning around this:
What outcomes do you want? Higher revenue? Lower churn? Better customer feedback?
What tools do you use across your business right now?
What data do those tools contain? The more specific, the better.
Where is your data stored? Is it accessible via an API or export feature?
What KPIs do you need to measure to get a full picture of your business at any given time?
How should those KPIs be presented across your team?
Bringing in others at this stage can be particularly helpful. The people who work in a given department every day often have a very good idea of what would allow them to do their job better and more easily — they'll know what data they need and how they want it presented.
The example in the community template above shows how you can get a 360 view into your customers’ sales information as well as outstanding support tickets. You can build on this example to integrate further customer data — like analytics data or usage data — from other tools.
Step 2: Build your data schema and match your customer records between different sources
Each tool that you use will store data in its own format, in its own database. To connect the data in multiple platforms, you’ll almost always need to learn the ins and outs of how each platform stores data. After understanding these intricacies, you’ll need to make a decision about what your exact data connections will be (as nobody will be able to make this decision for you). We recommend putting a disproportionate amount of thought into this in the beginning.
For this tutorial, we’ve just stored the relevant Salesforce company ID field within each Freshdesk ticket’s data. That way, we can always filter the relevant Freshdesk tickets based on the selected company in Salesforce. Here's what the data schema looks like for the customer dashboard template linked above:
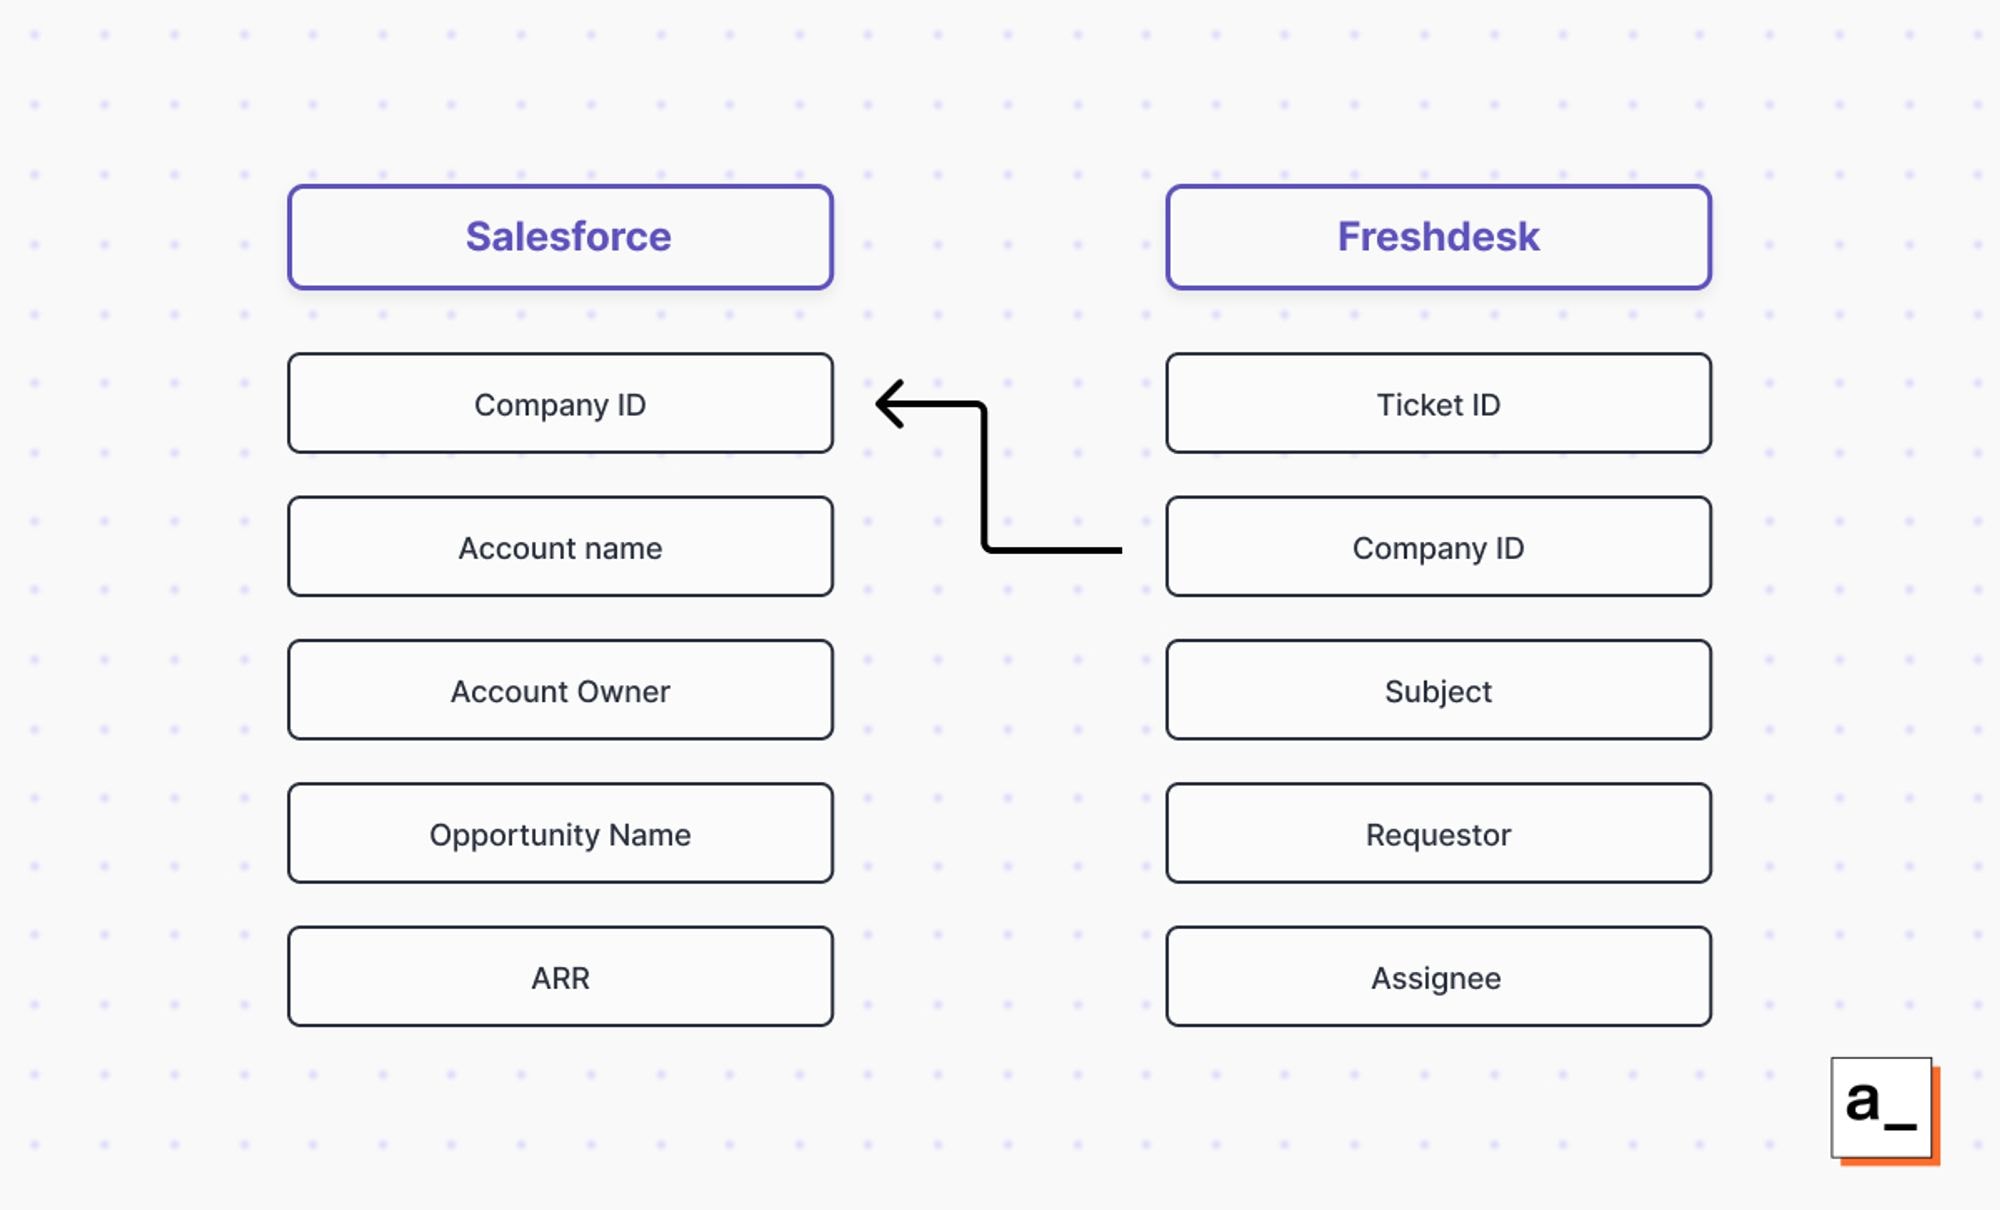
If you cannot find a consistent field across all of your tools for a specific customer, you may need to insert data into one tool that maps it to another (shown above) or provide an intermediate database that maps your internal customer ID to the relevant IDs on each platform.
Step 3: Connect your data to Appsmith
This step will be unique to you, the tools you use, and how you decide to connect them. Most modern SaaS tools will provide well-documented APIs to access the data you store in them (and if they don't, you should consider switching to ones that do). We provide Appsmith integrations for the most popular SaaS platforms, as well as support for REST and GraphQL APIs.
The example template we provide above integrates mock sales and support data from Salesforce and Freshdesk using Mockoon.
Step 4: Build the queries that retrieve the data you need
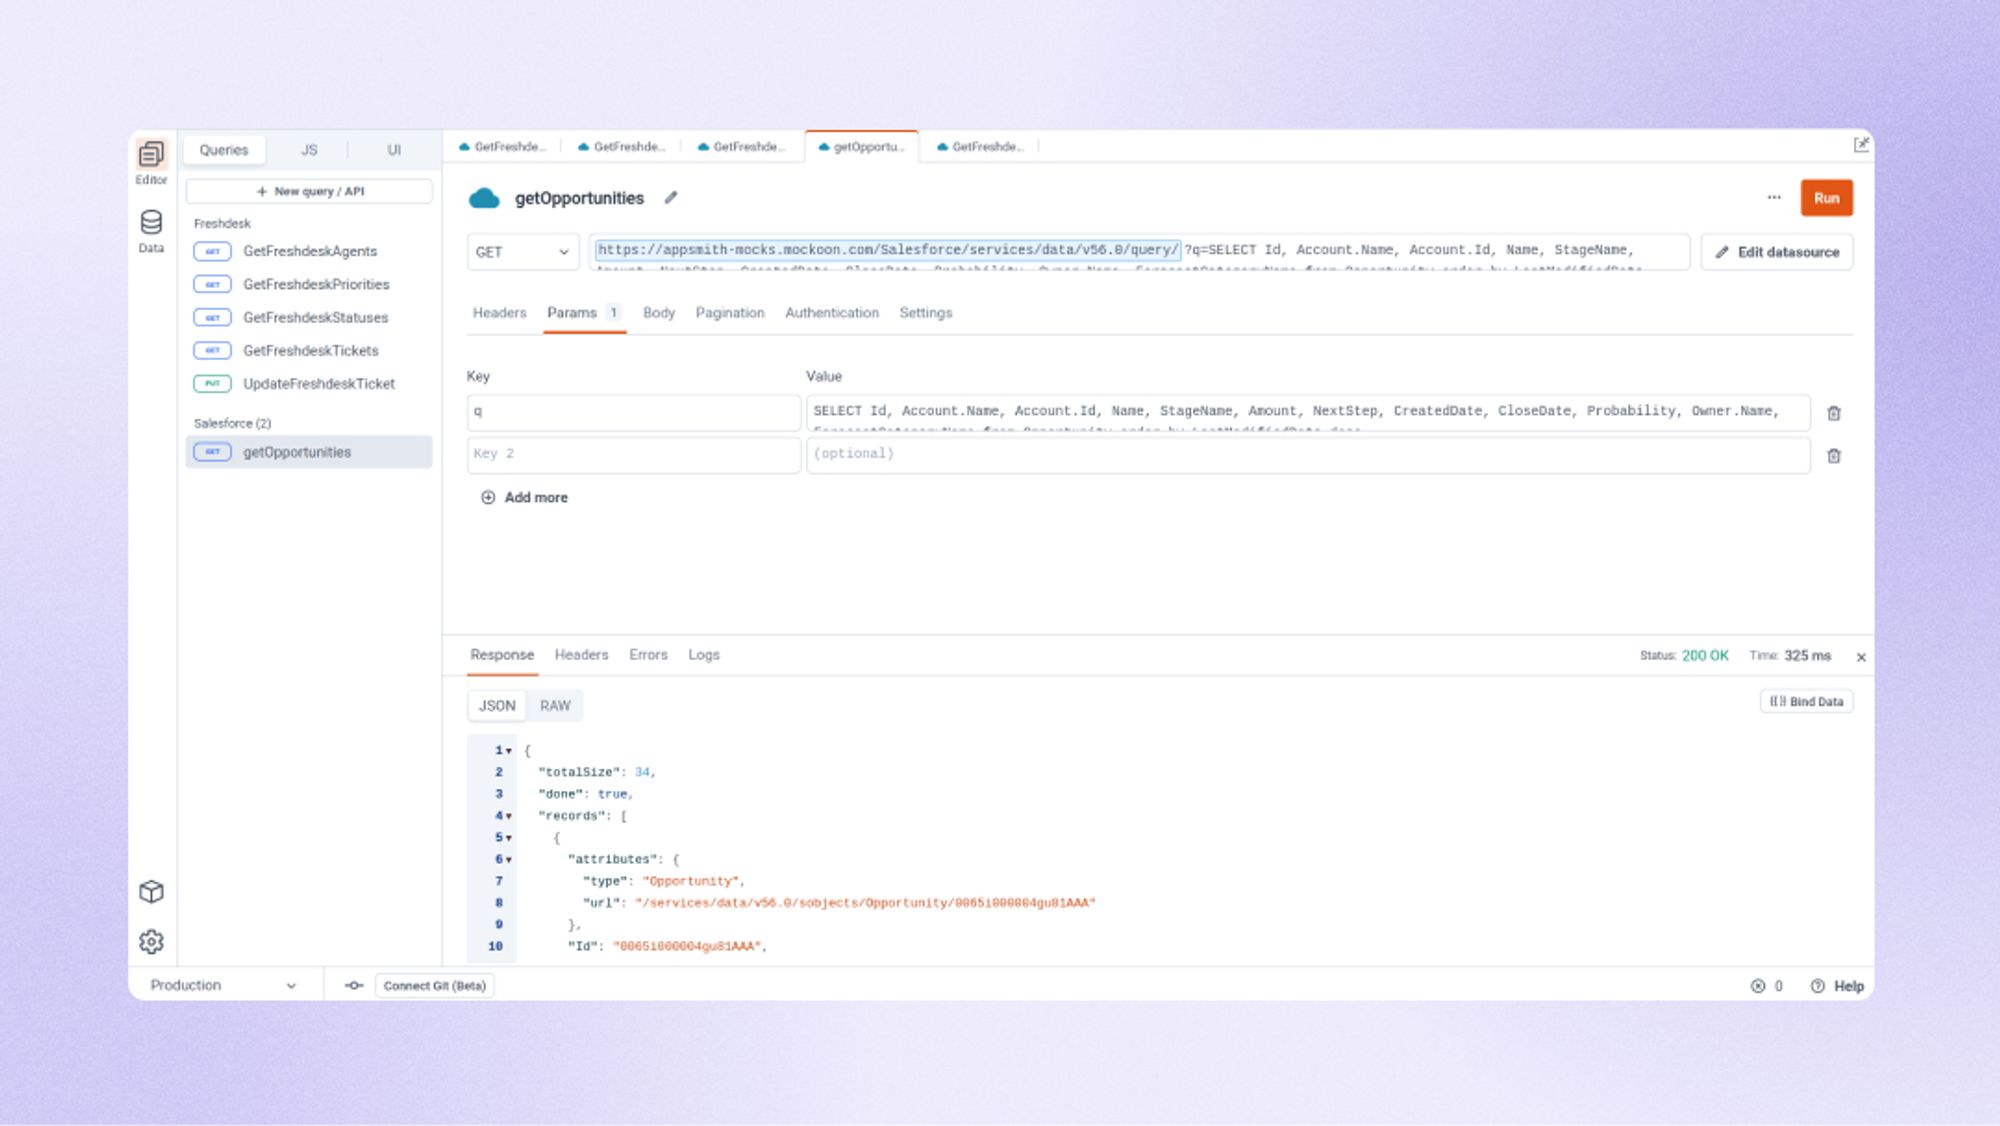
At this stage, you can access the data in your datasources by writing queries, process and format the data client side with Appsmith’s JS Objects, and display that data in your user interface using pre-built UI widgets.
For this tutorial, we have some default queries that are already written to handle the data from Salesforce and Freshdesk. You can edit these and add new ones to fit your application.
Step 5: Complete your custom dashboard with reports and visualizations
Once you've got your data connected and a basic user interface displaying your customer data from across your different apps, you should give your teams the opportunity to provide feedback so that you can make modifications to meet their needs. You can even let them modify the UI themselves: building user interfaces in Appsmith is intuitive, and even non-technical users can use our drag-and-drop app studio.
The tutorial template shows how we set up our Salesforce/Freshdesk interface to show the data we need to make good decisions. This serves as a customer dashboard example, showcasing how businesses can structure and optimize their dashboards for better insights. Once your interface is set up, you can continue to tweak it by adding graphs, visualizations, and reports.
Step 6: Test and deploy your app
To test your app, you should pick a few different customers, look up their data stored within the different platforms, and verify that all of the right data is coming through to your integrated dashboard. You should especially make sure that your customer records from across different platforms are correctly matched.
If there are any holes in your data, you will have to understand the root cause and possibly make your schema more robust to handle those cases. Otherwise, you should now have a fully built out version 1 of your application! From here, you can set up and substitute your own datasources.
Iterate, adapt, and keep your business agile
The ability to iterate and improve without risk is fundamental to the Appsmith experience. Our native Git integration means that you can experiment with, test, and deploy your applications, and easily debug or roll back changes if something goes wrong.
Unlike other tools, with Appsmith you’re never “stuck” with a business process – if you think of a better way of doing things or discover a new KPI you want to measure, you can easily try it out. Over time, you can also automate more processes as AI becomes more powerful with Appsmith AI.
Appsmith is open source and free forever, so you can hand this article off to your team for them to start experimenting with no costs. If your business needs stronger enterprise support, you can also contact us to discuss how to best leverage Appsmith within your business.