Building an Admin Panel with MongoDB using Appsmith


Many companies and organizations rely on internal dashboards or admin panels that are connected with different data sources. In this guide, you’ll learn how to integrate a MongoDB data source with Appsmith and build creative dashboards.
Building an Admin Panel with MongoDB
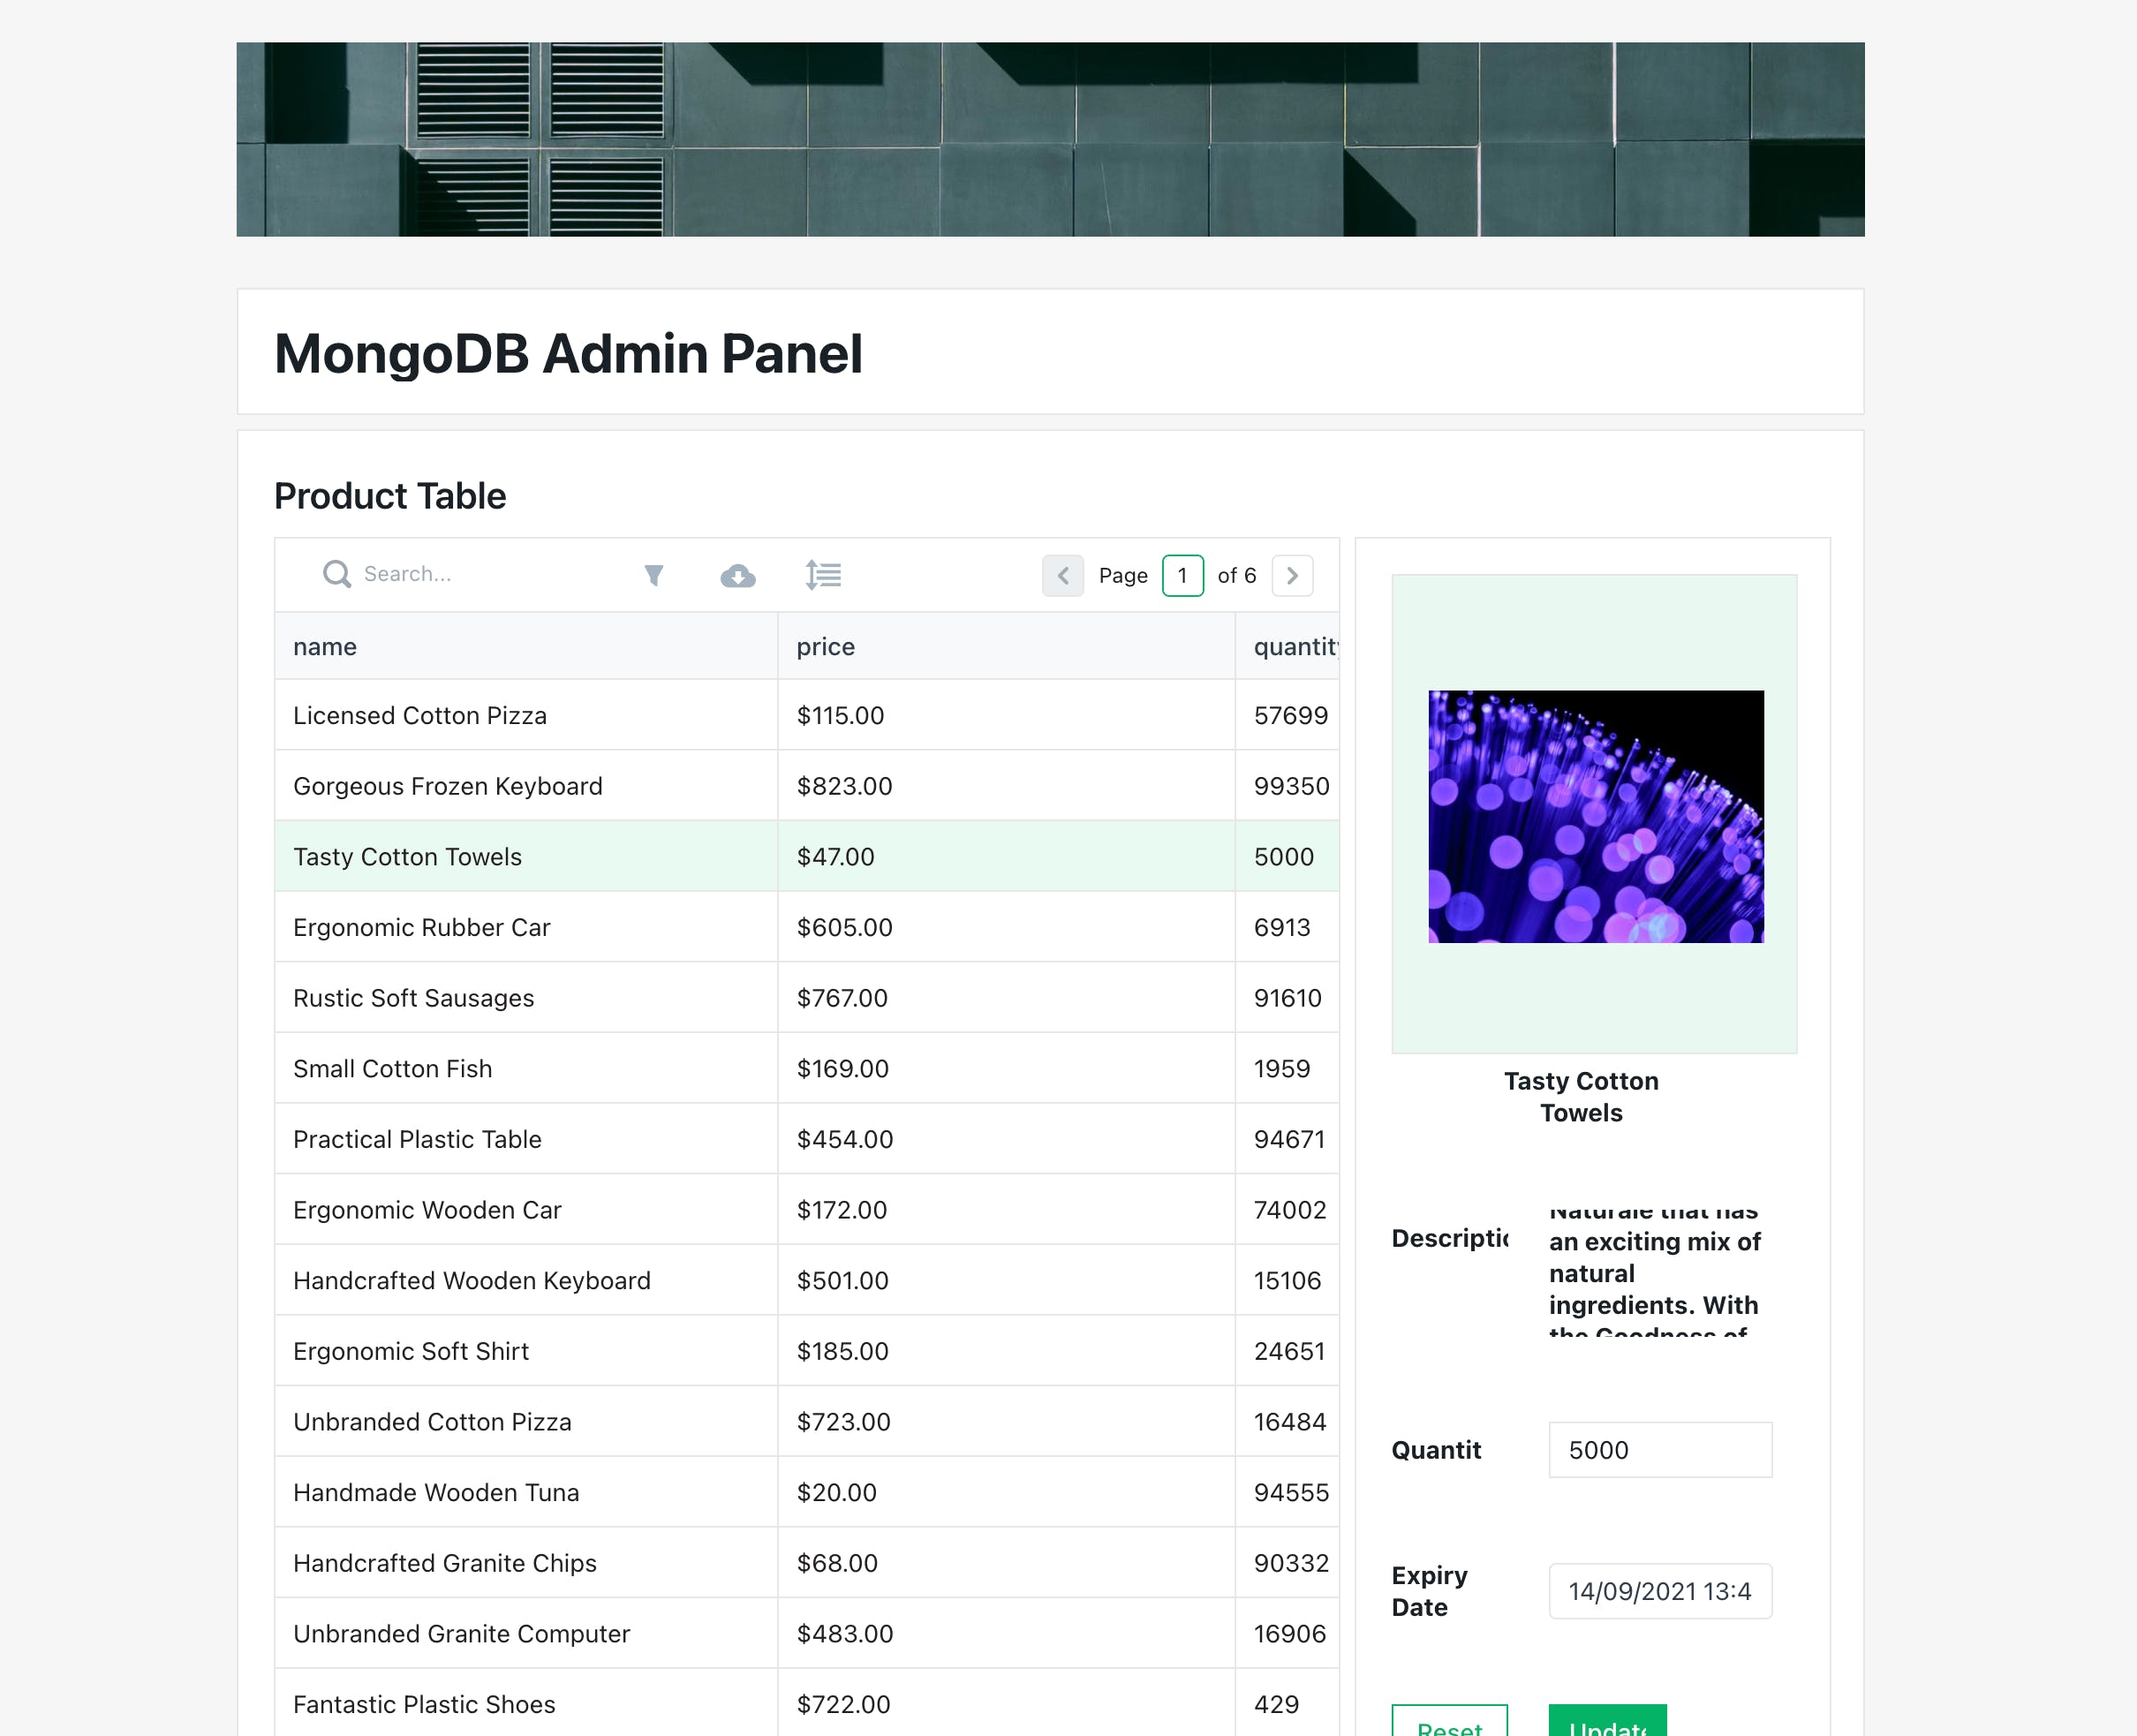
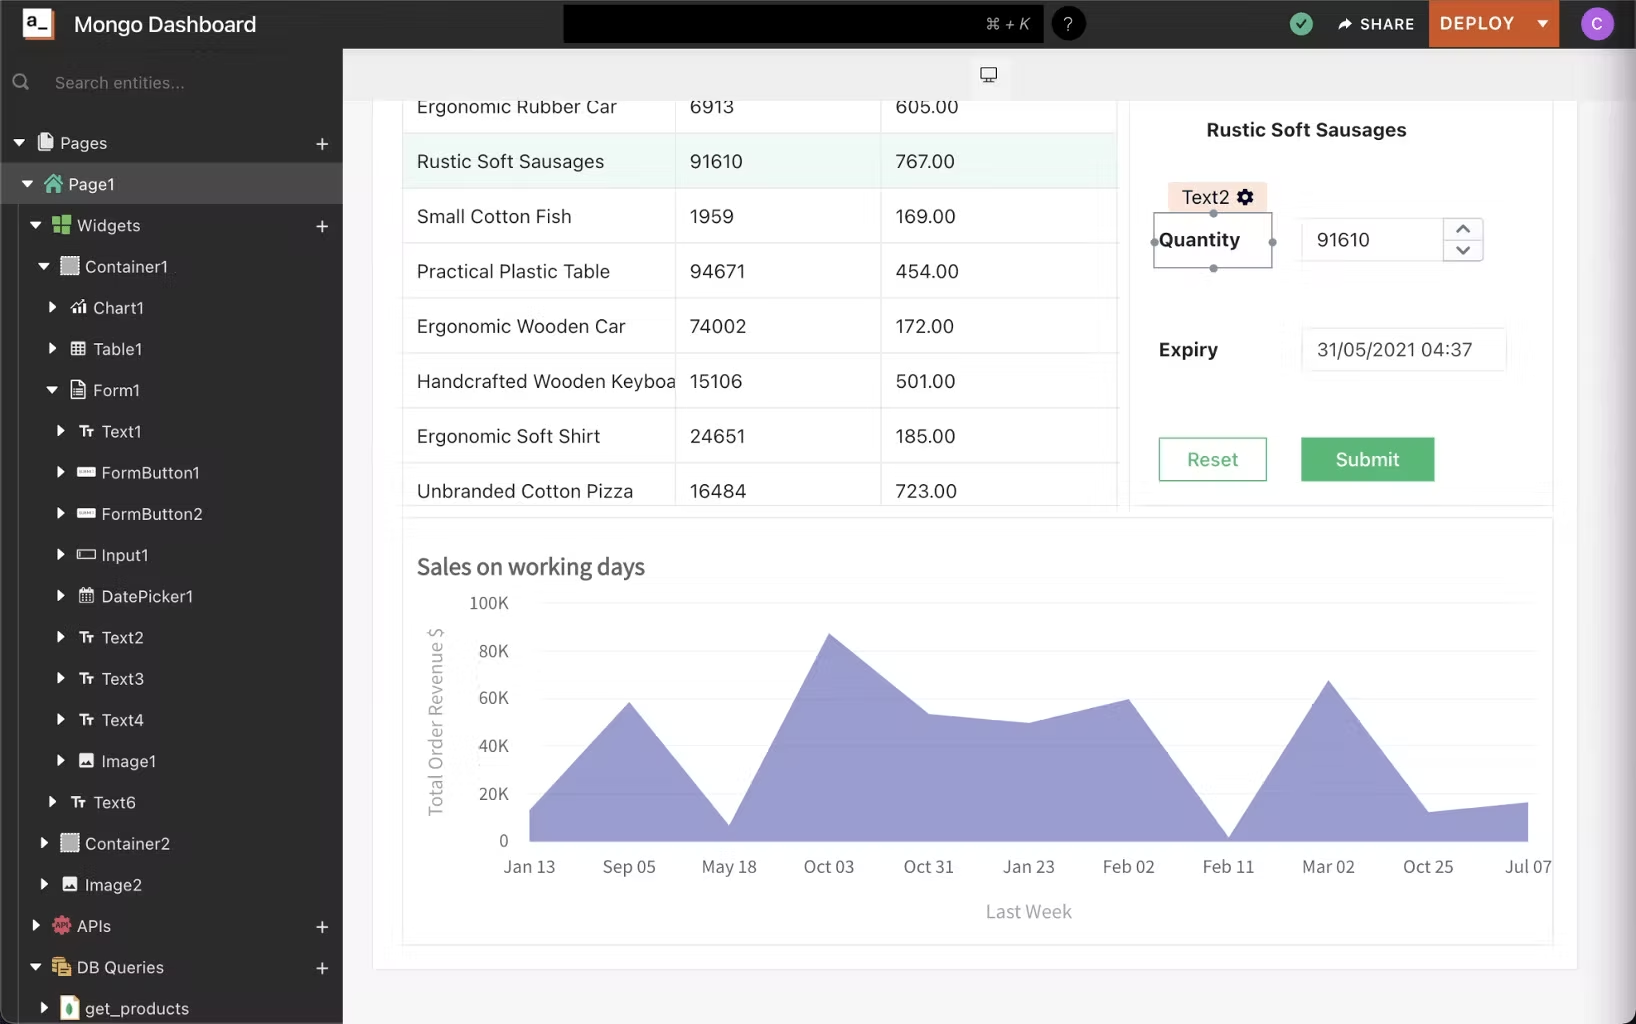
Usually, building an admin interface over MongoDB is a time taking process and a lot of configuration has to be made. Also, for database management, schemas and queries have to be maintained on a different platform. While the UI client would be needing one more server. But with Appsmith, you can have everything under one roof and you can build UI within no time. Let’s see how by connecting to MongoDB on Appsmith. Below is a screenshot of how our dashboard is going to look like:
If you prefer a video tutorial, check out our video on How to Build a MongoDB Admin Panel in 5 Minutes!
https://youtu.be/tisUaIgI86k
Connecting to a MongoDB Data Source
Usually, MongoDB clusters are hosted on the cloud. Now let’s connect to one of the example clusters that’s on MongoDB cloud and list out all the data that’s present inside the database. The database we’ve worked on is a collection of product and sales information. You can find the finished admin panel app here."
First, you’ll have to create a new application on Appsmith.
A new application opens up an application titled Untitled Application 1; you can rename it by double-clicking on the existing one.
Now click on the DB Queries and create a New Data Source button. Since we’ll be using MongoDB, select the MongoDB option listed there. Below is a screenshot of how the settings look like:
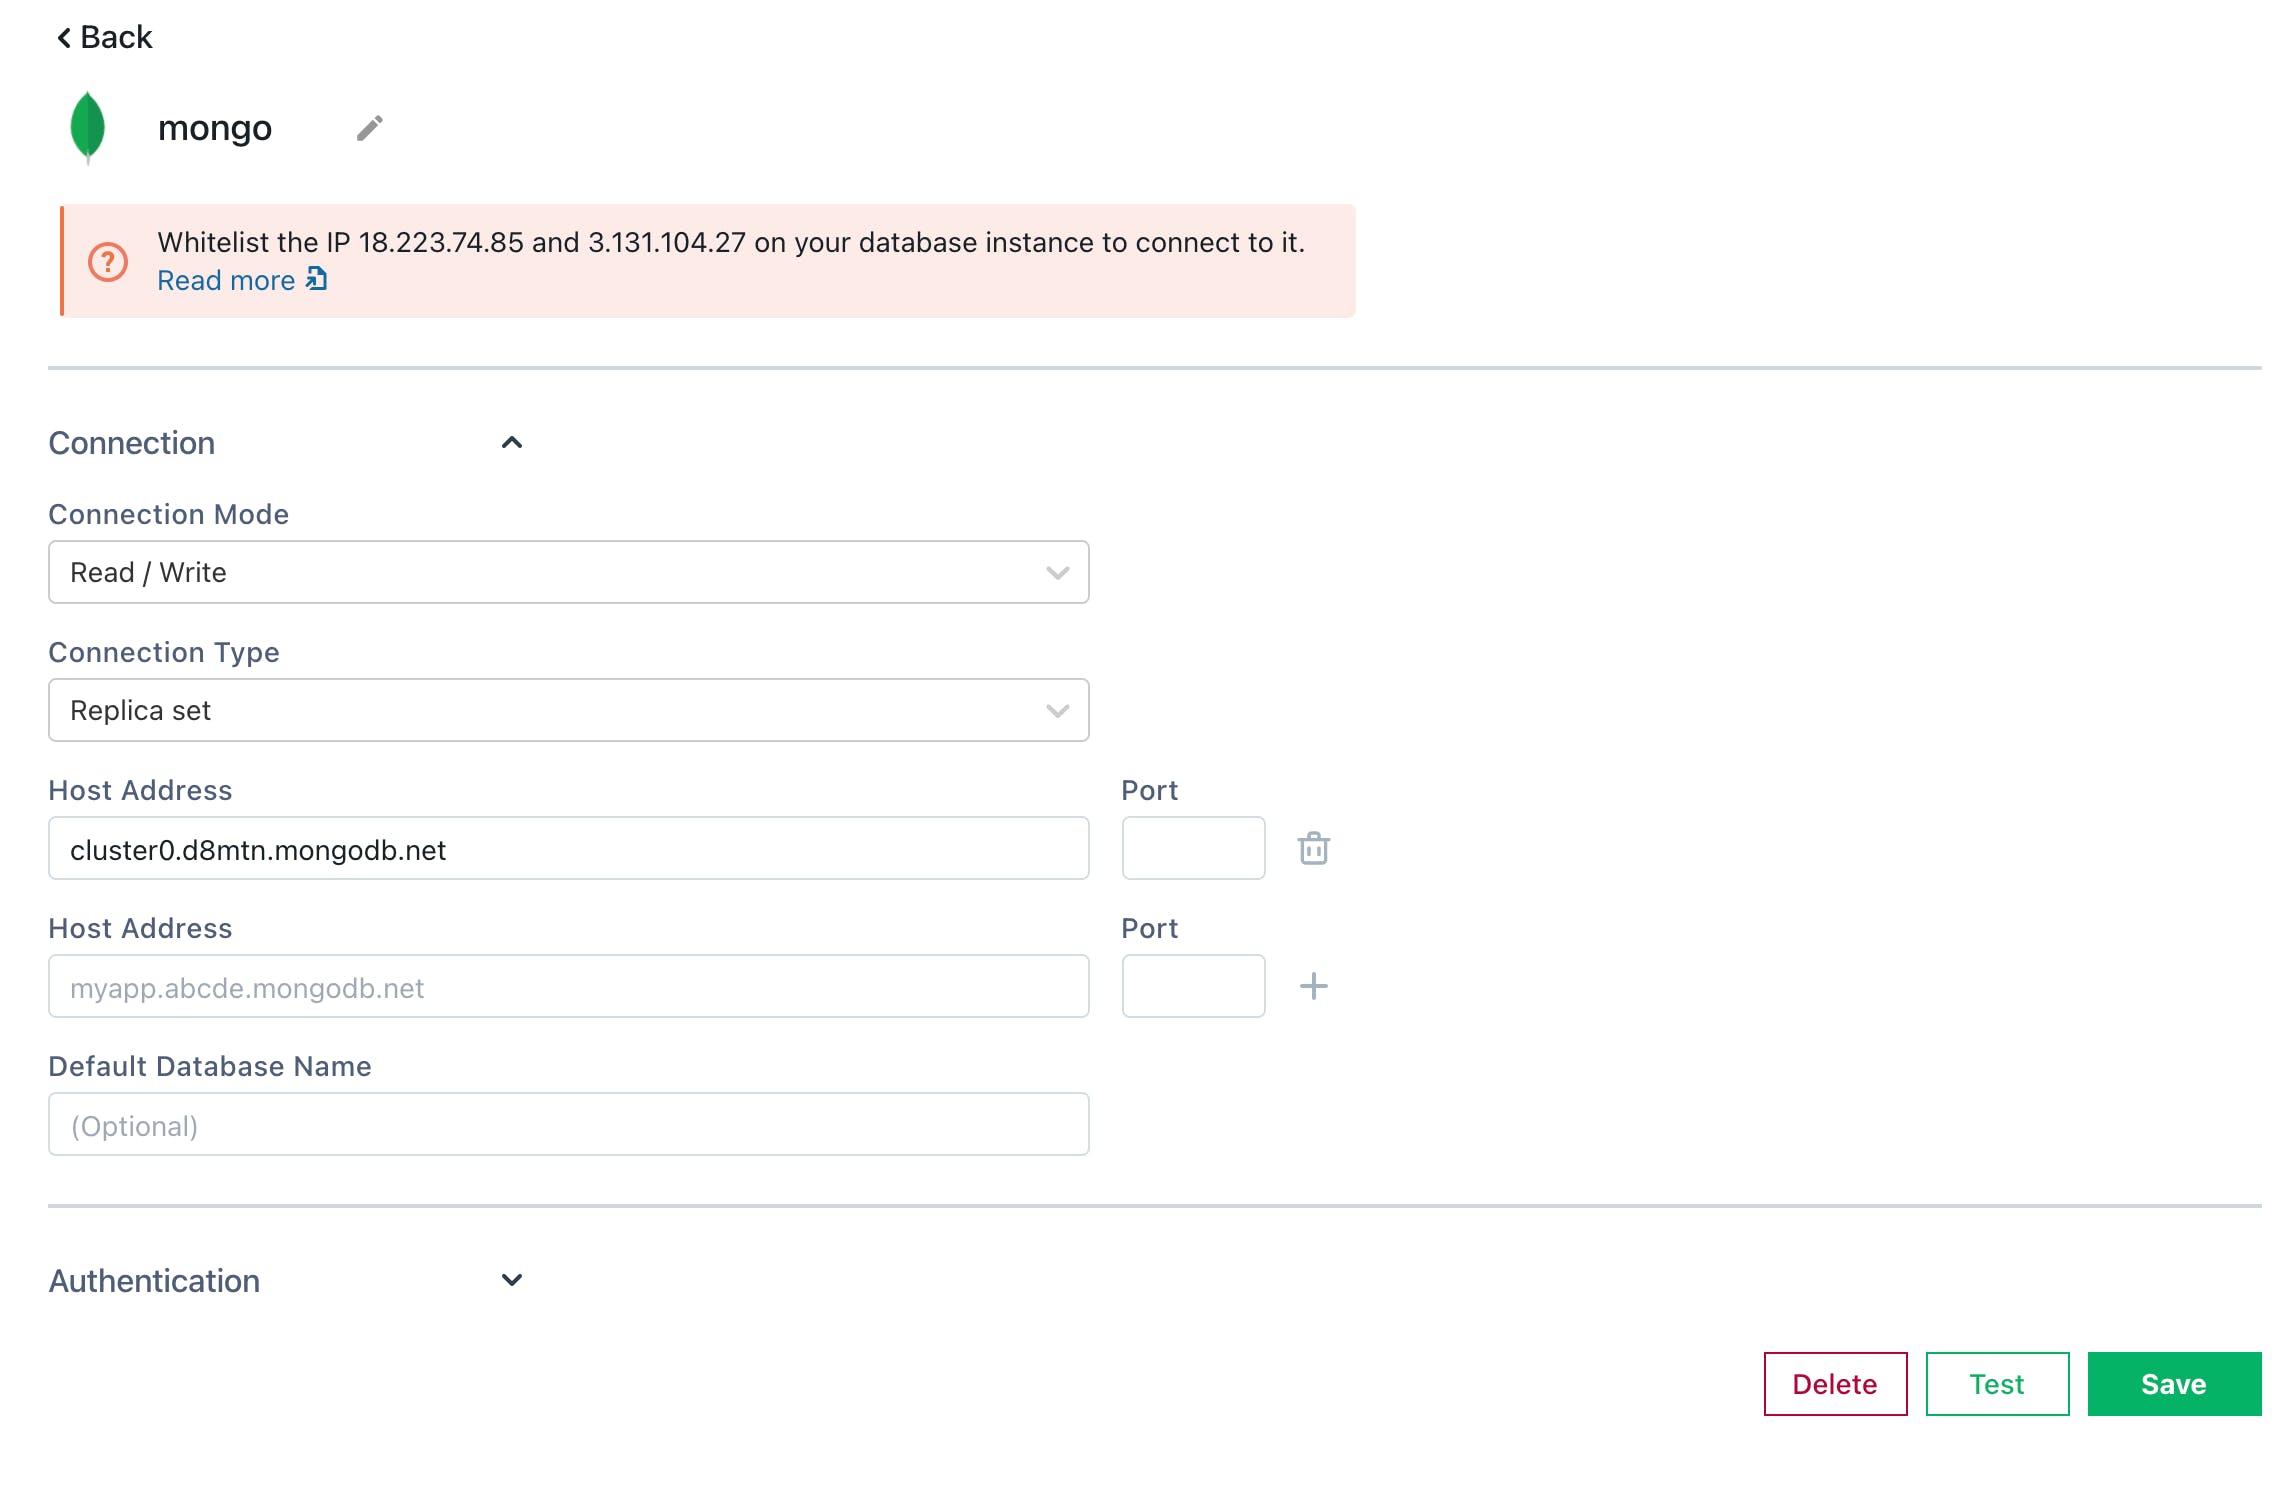
Next, set the Connection mode to Read/Write, Connection Type to Replica set.
Now you can add the host address, you can find this under your MongoDB cluster settings. In this guide, we’ll be using cluster0.d8mtn.mongodb.net
Next, click on the Test button to verify if the credentials are configured correctly or not. Once verified you can save the data source and then start working on your queries
Finally, we’ll create a new query to fetch items from the product collections by clicking Create Query Use the following code snippet to fetch products from the produc collection:
{
"find": "products",
}
Let’s name this query get_products and hit run to view the query response.
Displaying the Data onto UI
You have your data-source connected, and also a query that can fetch all the product items for you. Now, let’s put these on a table and render all the data. To do this, you’ll have to navigate to the Page, find the Table Component under the Widgets section, drag and drop it to the canvas. Next, open the table’s property pane by clicking on the cog-wheel on the table. Now under the Table Data property, add the following snippet:
{{get_products.data}}Here, you’re using the get_products DB query and rendering the data from it onto a table.
“”"Appsmith allows us to parse javascript using the moustache syntax {{ }}."
Update an Item on MongoDB with Appsmith
Not just reading data, with Appsith you can perform all CRUD operations on the MongoDB. Now on our dashboard/page let’s create a form that allows us to update any selected value on the table.
First, search for a Form widget that will house the input fields.
Next, add some Text fields to visually indicate the product being updated (we can optionally display product image).
A Number input to update product quantity.
A Date input to update the product expiry date.
To build this form, we’ll need to drag over a form widget, a bunch of text widgets, an input widget, and a date picker widget to the canvas. The form should look like this after setting up the UI:
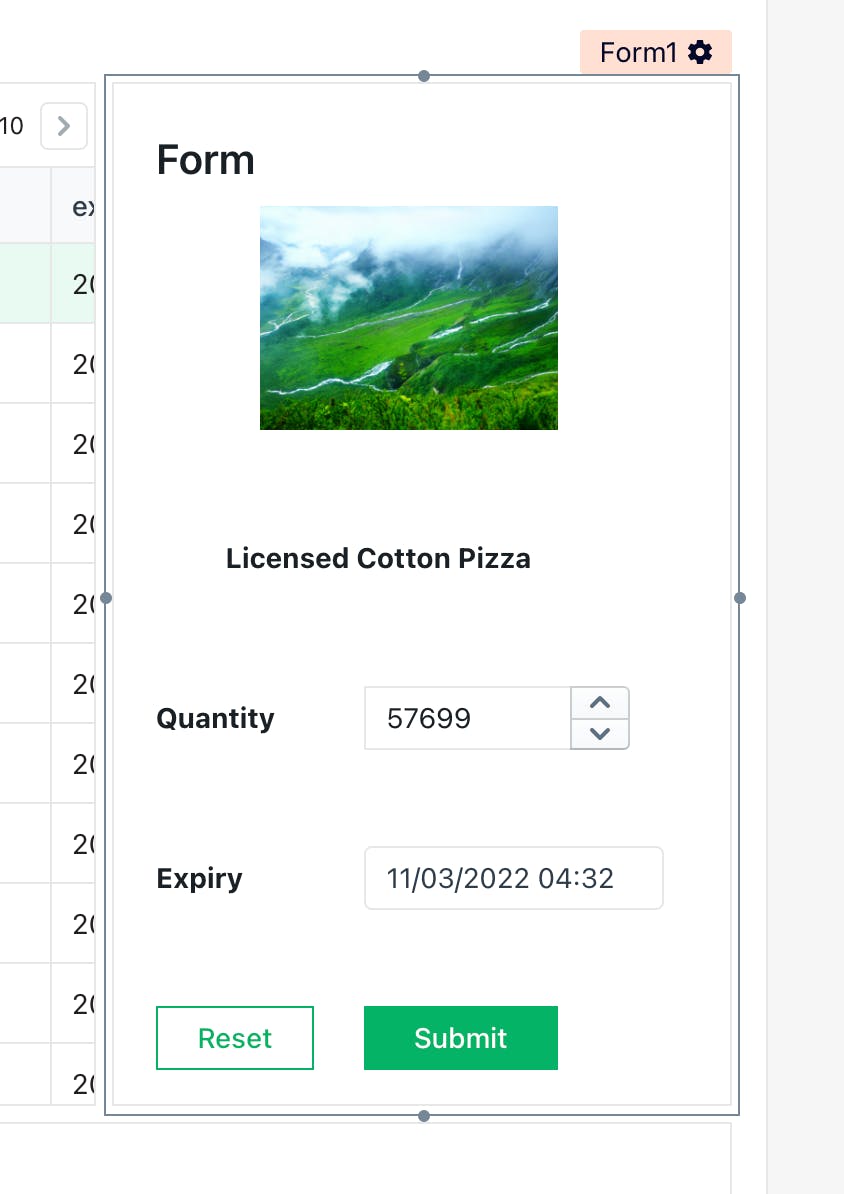
Once we have the form setup, we would need to link the form to the table so that when a product is clicked on the table, the corresponding information is pre-filled on the form.
Appsmith provides us with an easy way to hook into a widget’s state. You can configure the text widget to show the name of the product selected on the table by setting its Text property to:
{{Table1.selectedRow.name}}You can do the same for the date picker and input widget so that the default text is set based on the item clicked on the products table. For example:
{{Table1.selectedRow.quantity}}Also, don’t forget to set the Data Type of the input widget to Number.
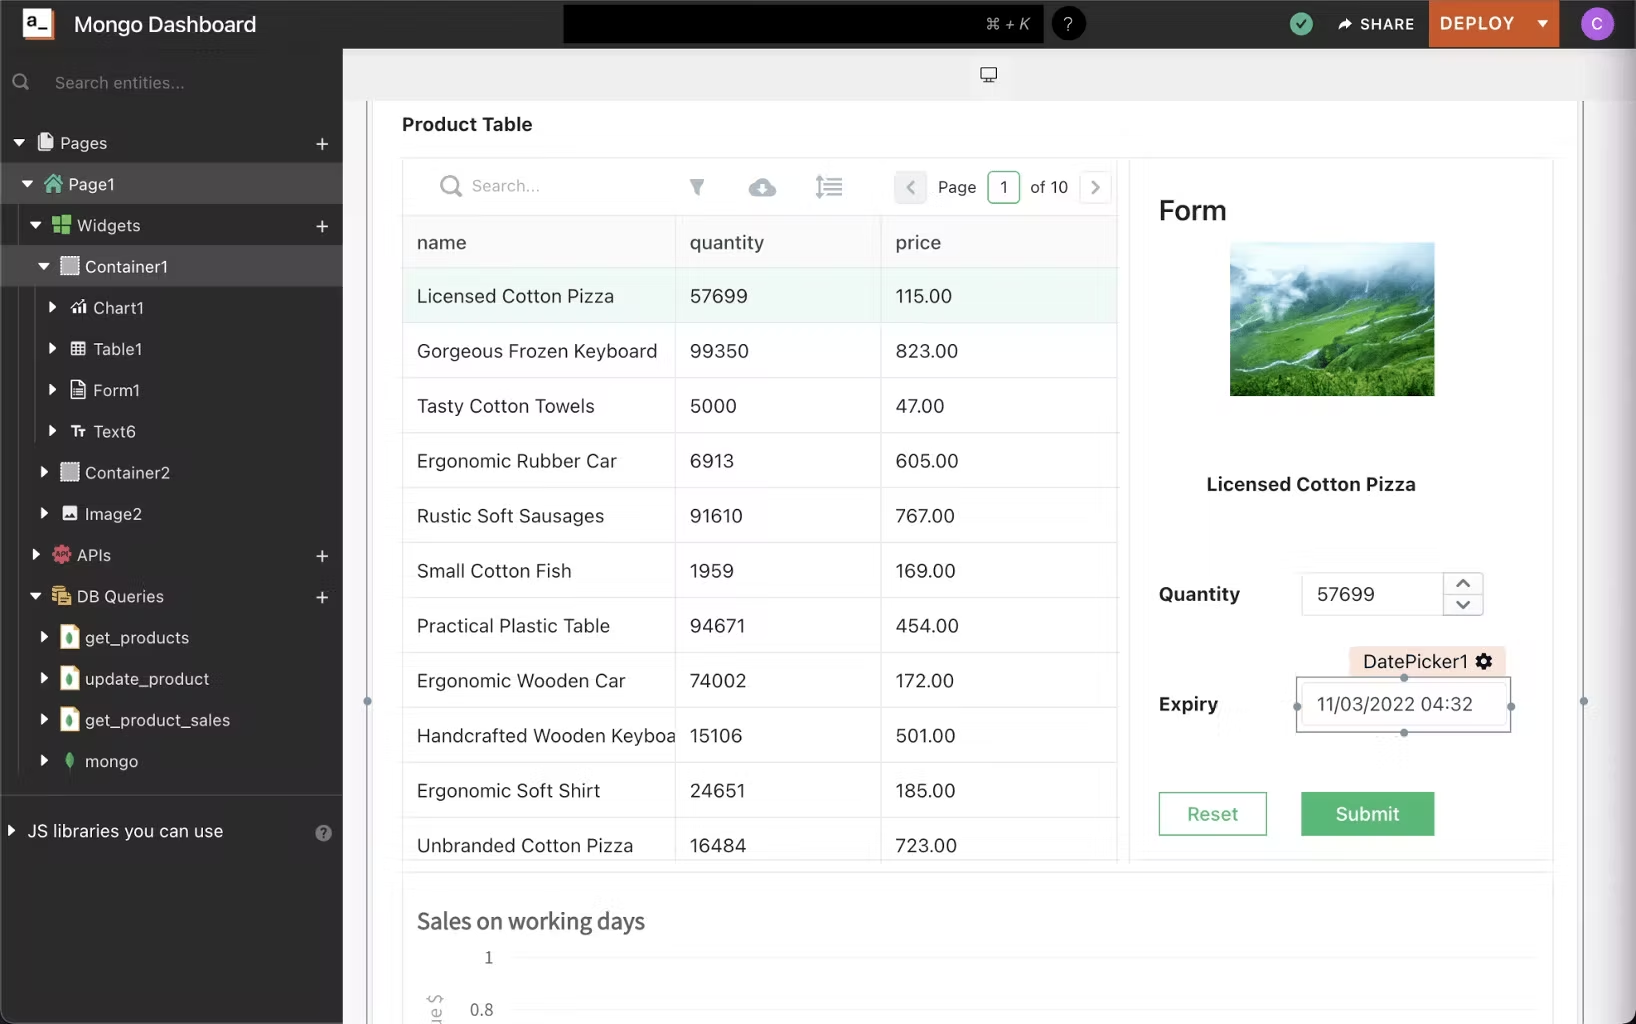
Lastly, you’ll need to write a query that grabs data from the form and updates the product selected on the table when the submit button is clicked. To set this up, click on the cogwheel on the submit button. Then set the onClick to execute a DB query and then click on create a query:
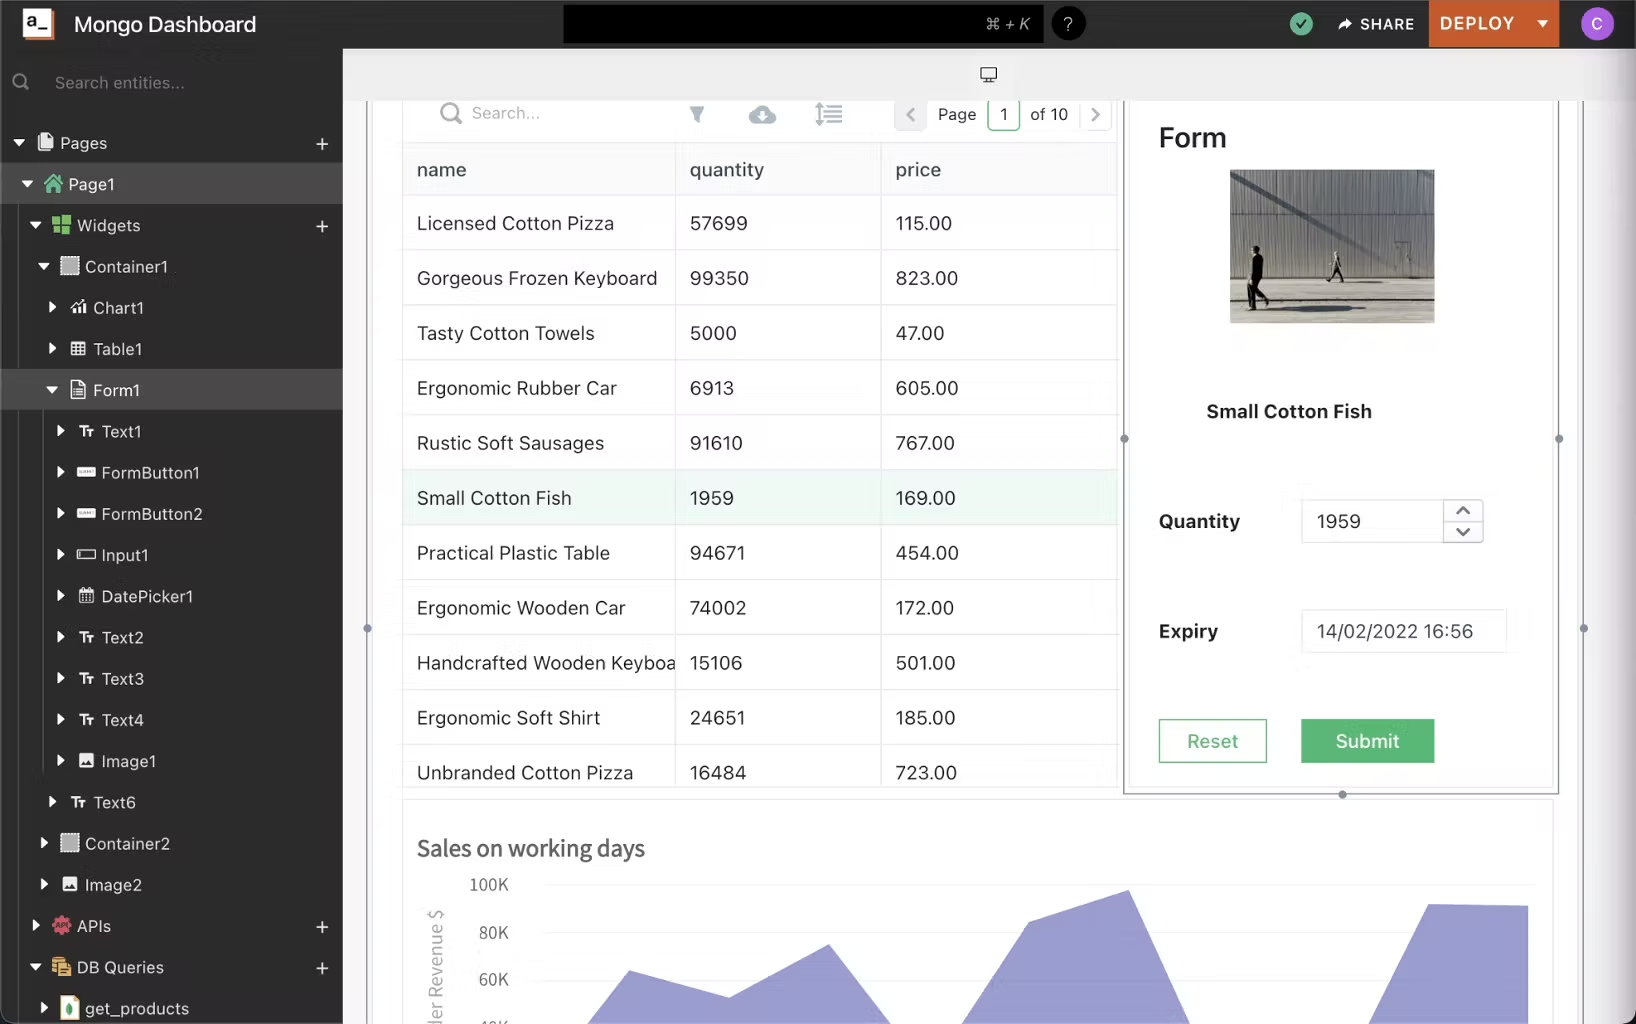
Let’s call this query update_product and configure it this way:
{
{
  "update": "products",
  "updates": [
    {
      "q": {
        "_id": ObjectId("{{Table1.selectedRow._id}}")
      },
      "u": {
        "$set": {
          "quantity": "{{Input1.text}}",
          "expires_at": "{{DatePicker1.selectedDate}}"
        }
      }
    }
  ]
}
The update_product query shown above updates the item with _id selected on the table with quantity and expires_at gotten from the input and date picker widgets. Clicking the submit button on the form triggers this query.
You’ll now have a functional dashboard that displays product information with a form that allows us to update an individual product.
Displaying Data in a Chart Widget
Additionally, you can display data using charts. We have a sales collection that lists sales data of a particular product. It’s a good idea to display this data in a chart.
To build this functionality, we need to go back to the table widget and configure the onRowSelected action to execute a DB query and then, click on create a new query.
Let’s name this query get_product_sales and configure it like this:
{
  "find": "sales",
    "filter": {
    "product": ObjectId("{{Table1.selectedRow._id}}")
  },
}
The above query filters sales information on the sales collection for the product with the _id selected on the table. Also, this query will run whenever a row is selected on the table.
Lastly, we need to display the data from this query in a chart widget. So drag in a chart widget and configure the Chart Data to be:
{{
getproductsales.data.map(s => ({y: s.quantity, x: moment(s.date).format("MMM Do")}))
}}
And we can see the chart widget re-rendered with the sales data for the selected product on the table. You can go ahead and tweak the widget as you see fit.
Deploying the MongoDB Admin Panel
To deploy the admin panel, hit the deploy button at the top right corner. You can share the admin panel by clicking the share button and toggling the switch to make it public or only invite people you want to have access to the app (i.e people in your organization) via email.
Kudos! Your admin panel is now up and running!
with inputs from Confidence Okoghenun
