Build an Invoice Approval Inbox with Xero

In the previous chapter, ‘How to Connect the Xero API to Appsmith’ we created an Appsmith application which connected to your Xero account through the oAuth API and displayed a list of invoices on a table. In this chapter, we’re going to extend that application further by adding actions to enable the user to approve an invoice.
“”Content from Tick9, an Appsmith partner
Requesting New Permissions
Up to now, we created a read-only Xero application, however in this chapter we’ll be writing changes back to your Xero account. So, we’ll need to request additional permissions from Xero.
Under ‘Datasources’ on the left-hand side of Appsmith, click on your Xero API connection and press the ‘Edit’ button on the top-right. In the ‘Scopes’ field, simply update the value with the below:
openid,
accounting.transactions,
profile,
offline_access,
accounting.contacts.read,
Then, click on the “Save and Re-Authorize” button to reauthorize with Xero with the additional permissions enabled.
Cleaning Up
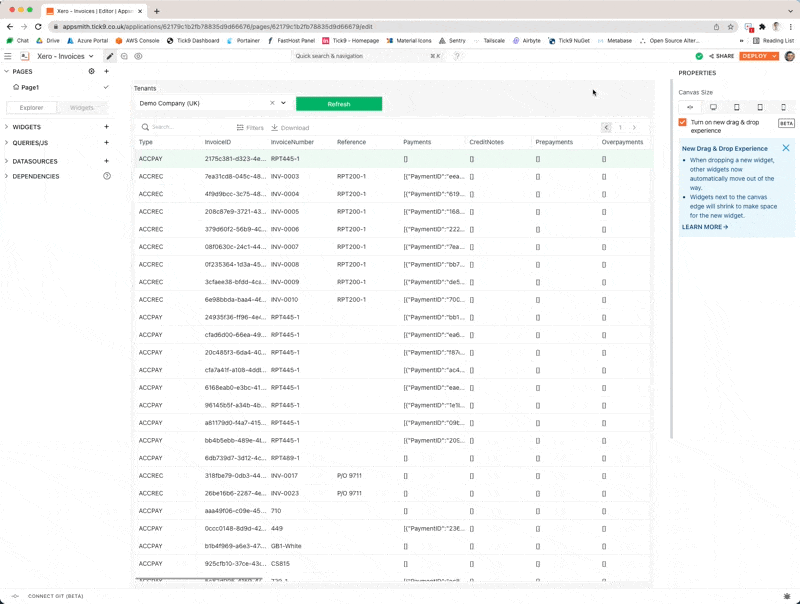
If you’re following from the previous chapter, when you bind an array of objects to a table, it will by default, display every field from the objects in the array. So let’s clean this table by hiding the columns we no longer need.
In the ‘Edit’ mode, click on the table on the page, and under ‘Columns’ press the button on the far right to hide columns you don’t need.
Now you’ve tidied up the columns, do you want to display every invoice, or only the invoices which are awaiting approval? If you require the invoices only needing approval, go over to the getInvoices query, select the Params , create a new row with the name Statuses with the value DRAFT,SUBMITTED . Once you re-run the query you will find that the table will show only the invoices which require approval.
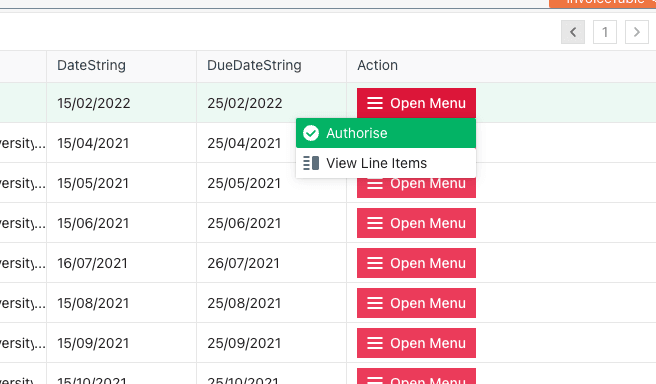
Creating an Action Menu

Whilst selecting the table, on the right hand side, go to the bottom of the ‘Columns’ list and click on ‘Add a New Column’. Then, under the ‘Column Type’ menu, select the item ‘Menu Button’.
On our menu, the user will have a choice of two actions, ‘Authorize’ which will set the status of the invoice as ‘AUTHORIzED’ in Xero, and ‘View Line Items’ which will open a dialog for the user to view the individual line items of the selected invoice.
You may choose the customise your menu item further by setting an icon, background and text colours.
Viewing Line Items
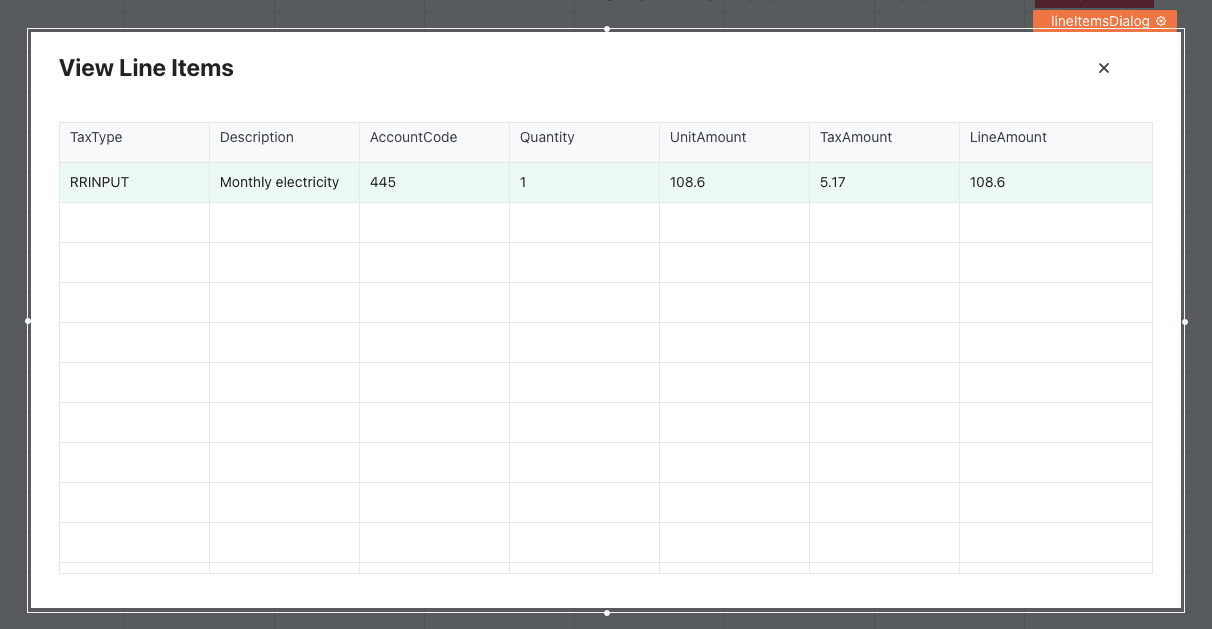
Next up, let’s create the dialog which will appear when the user clicks on the ‘View Line Items’, go back to the ‘Widgets’ section on the left hand side and drag-and-drop a ‘modal’ widget and give it a name (e.g lineItemsDialog). Then, within the same modal, drop a ‘table’ widget inside of it. Once placed comfortably within the dialog, bind the table to the following data source {{invoiceTable.selectedRow.LineItems}} . This will now display the list of line items on the table.
Now, let’s make the dialog open when we click the menu option, go back to your main table widget on the page and find the menu column you just created. Go to the ‘View Line Items’ menu option, under the onItemClick menu option, select Show modal and then click on the dialog you created (e.g lineItemsDialog).
Great, deploy your application and try out the dialog you just created.
Approving an Invoice
Let’s now connect up the ‘Authorize Invoice’ button to an API action, so when you click on the button, it will send the request to the Xero API to change the status of the invoice to the ‘AUTHORIzED‘ type.
On the left-hand side, click on ‘Add Query/JS’ and select on ‘New Xero Query’. Set the name approveInvoice and set POST as the HTTP action. In the URL field, we want to bind the selected Invoice ID to the query – so paste the following:
https://api.xero.com/api.xro/2.0/Invoices/{{invoiceTable.selectedRow.InvoiceID}}
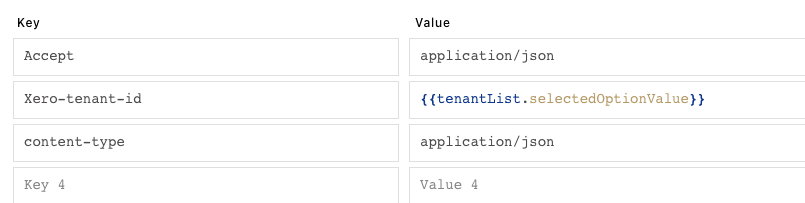
Then we need to apply the same standard headers to inform Xero of the organization, and the type of data we’re sending/receiving.
Next, click on the ‘Body’ tab, select the ‘JSON’ switch and paste the below JSON body. This will provide Xero with the fields which we’re changing, in our case, the status of the invoice.
{ "Status": "AUTHORIZED"}
Then, click on the ‘Settings’ tab and enable ‘Request confirmation before running API’ – this will prevent accidental approval of invoices, by confirming with the user before committing to the action.
Finally we need to wire up the button on the table menu to the API action. Return to your page, select on the table and find your ‘Action’ column. In the ‘Authorize’ menu option, click on the JS button alongside the onItemClick label and paste the below JavaScript.
{
  {
    approveInvoice.run(
      () => {
        showAlert("Great, your invoice was approved!", "success");
        getInvoices.run();
      },
      () => {
        showAlert(
          "Oops! An error occured. Please check your API connection and try again.",
          "error"
        );
      }
    );
  }
}
Let’s break-down what this code snippet is doing. When the user clicks on the menu button, it will run the approveInvoice query. In the first argument, the code is executed when the request was successful, so we’ll display a notification to the user informing them of the successful action, and then refresh the getInvoices query. The second argument will execute on failure, in this case, display a notification to the user that an error has occurred and that they may want to try again.
Great, that’s it! If everything has gone to plan, you should be able to deploy the application, click on the menu and approve an invoice on the table.
Thank you for reading! If you’ve got any questions, or have an issue following this guide, then please don’t hesitate to reach out by emailing luke@tick9.co.uk.