Building a Github Stars tracker for your open source project

Github interface is not very convenient to track the stars of your open source project, and it needs a lot of clicks, and hard to access all required information. We at Appsmith, as an open-source project, always wanted to keep track of our stars and see who is interested in our product. So we built an application using Appsmith to see the profiles of users who starred our repository. In this tutorial, we'll learn how we can build this star tracker app in just 10 minutes. The Idea!
This star tracker application has a table to show a list of users who have starred a repository.
A container that shows more details of selected users like Name, Location and Company.
Check out the live demo of the app here. Building the Application To begin, you'll need to sign up for Appsmith (it's free!). If you already have an account, sign in and click Create New to create a new application. Name the application as Github Star Tracker. Now, we will start with the output - what do we want to see and where? Appsmith makes it super easy to do so. Let's start with a simple text widget to display number to GitHub stars for the Appsmith repo. Next, let's add a table widget so we know what data we want to see. We will make the application more complex as we progress. We'll name this table starred_users, and it is essential to remember this name, as we will use this to reference queries later on.
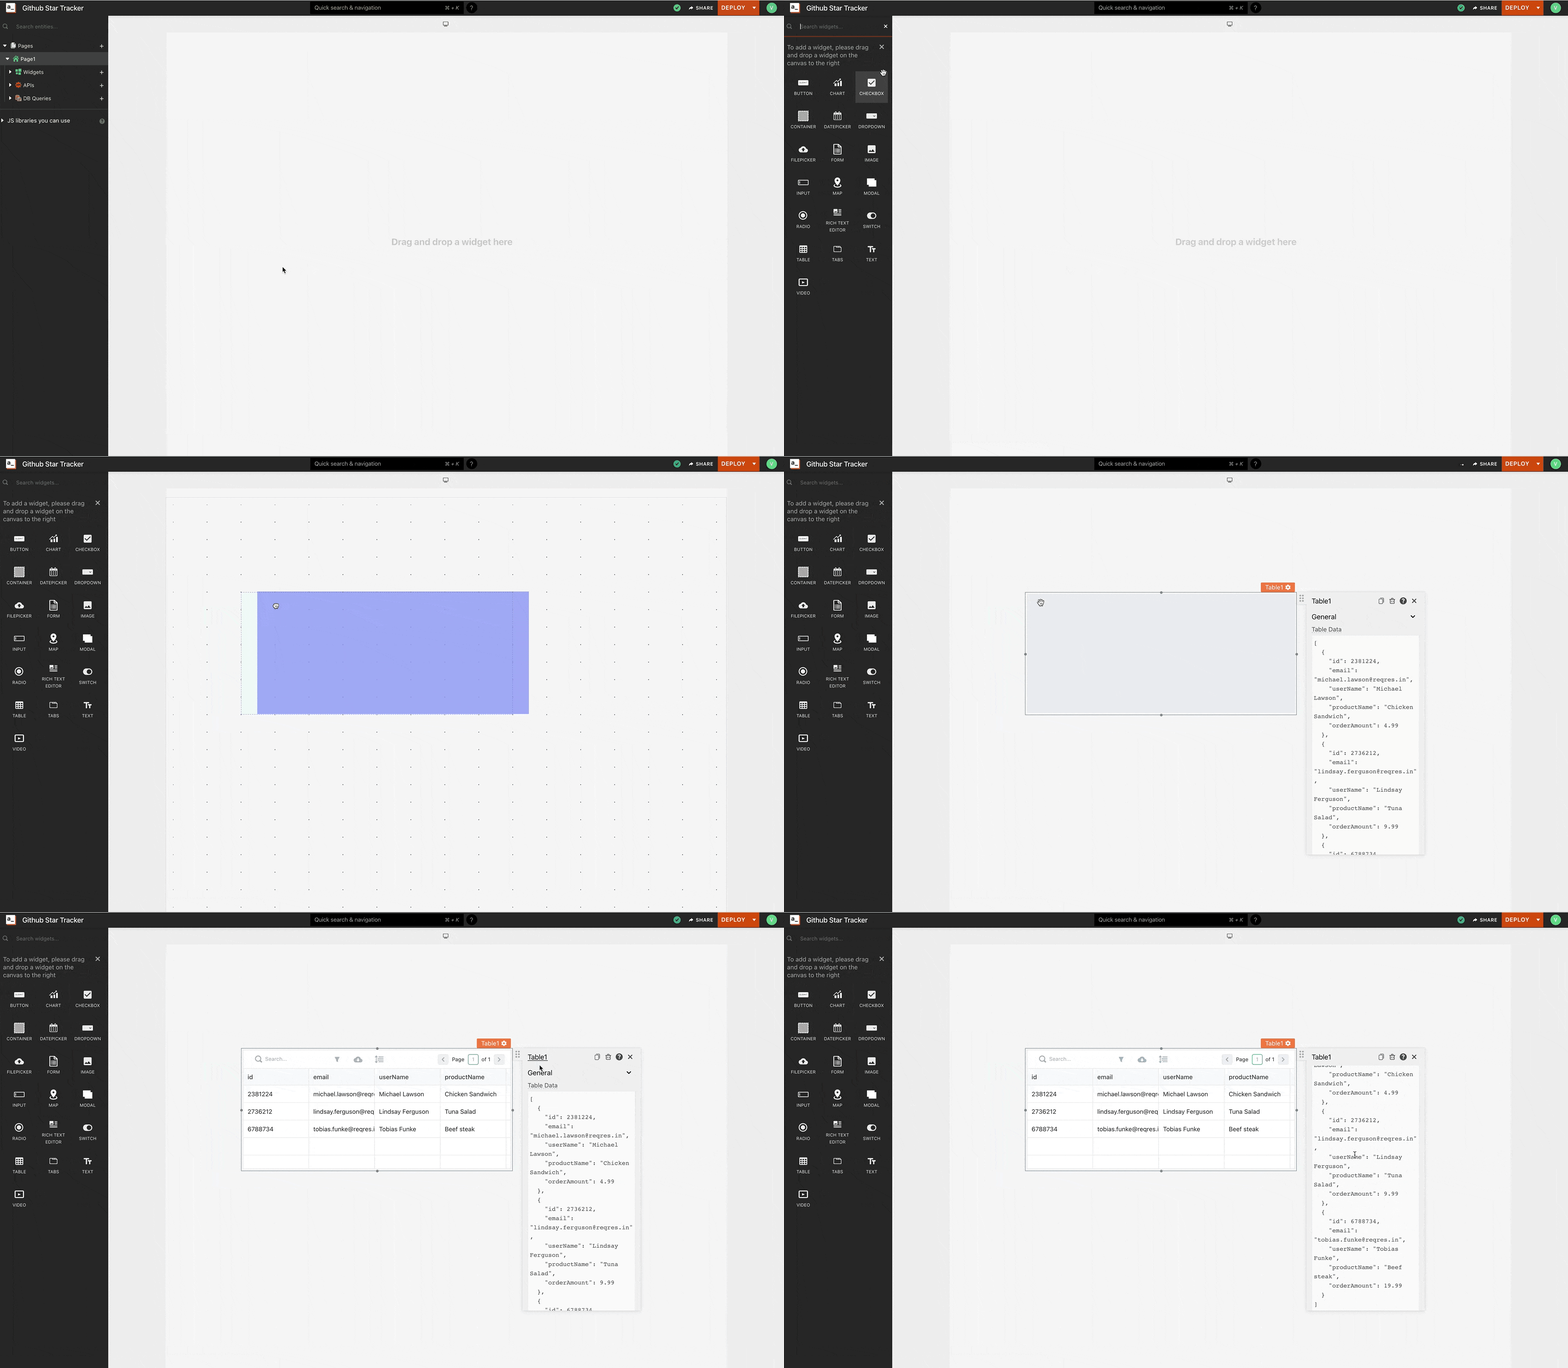
You can see that Appsmith auto-populates the widget with sample data to show you what the render looks like. Once we set this up, we will dynamically change the content in the widget. Using the other widgets in the widgets pane, let's create a user profile section to the right of the table. We're using Text widgets for this. Let's start with username, company and location as these are very common in Github.
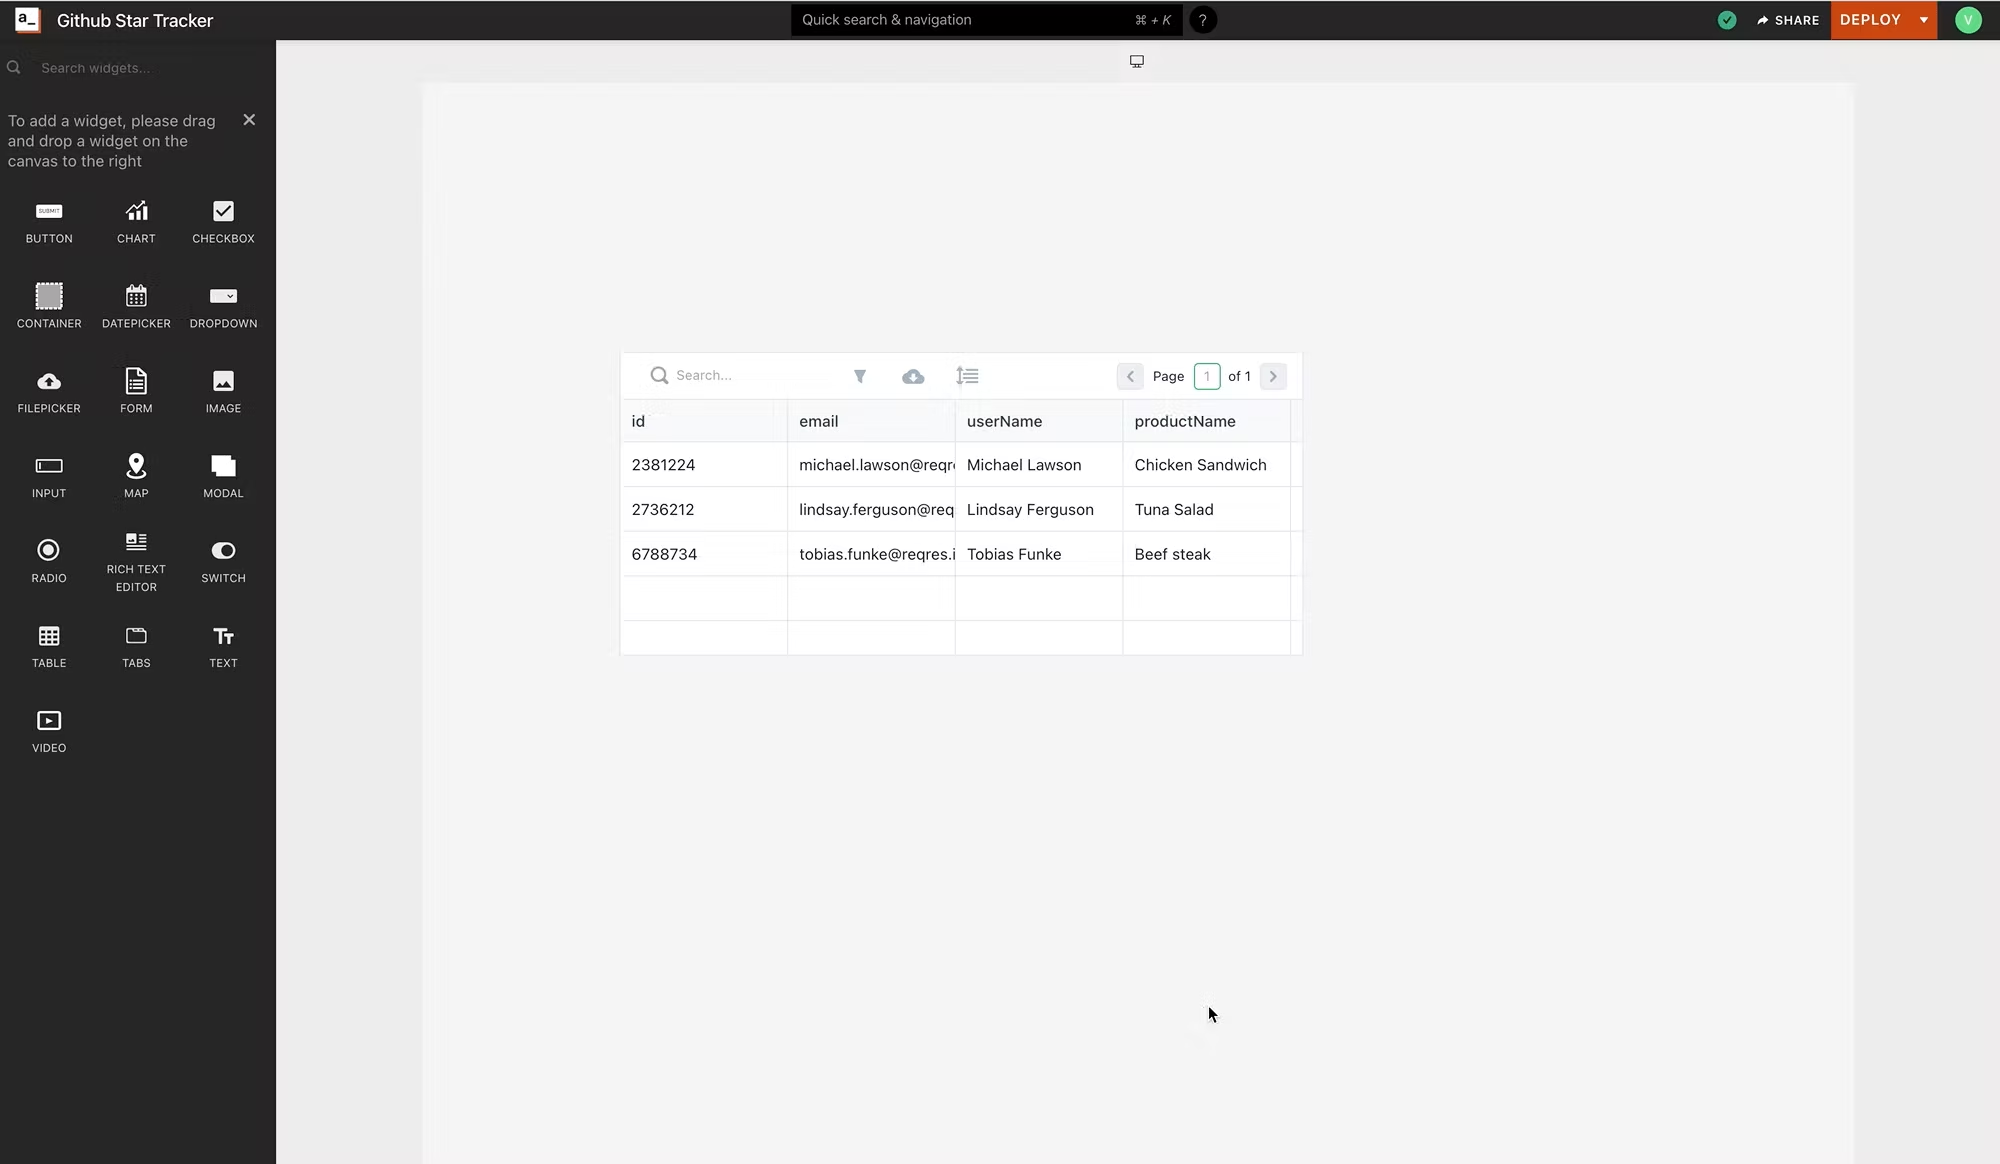
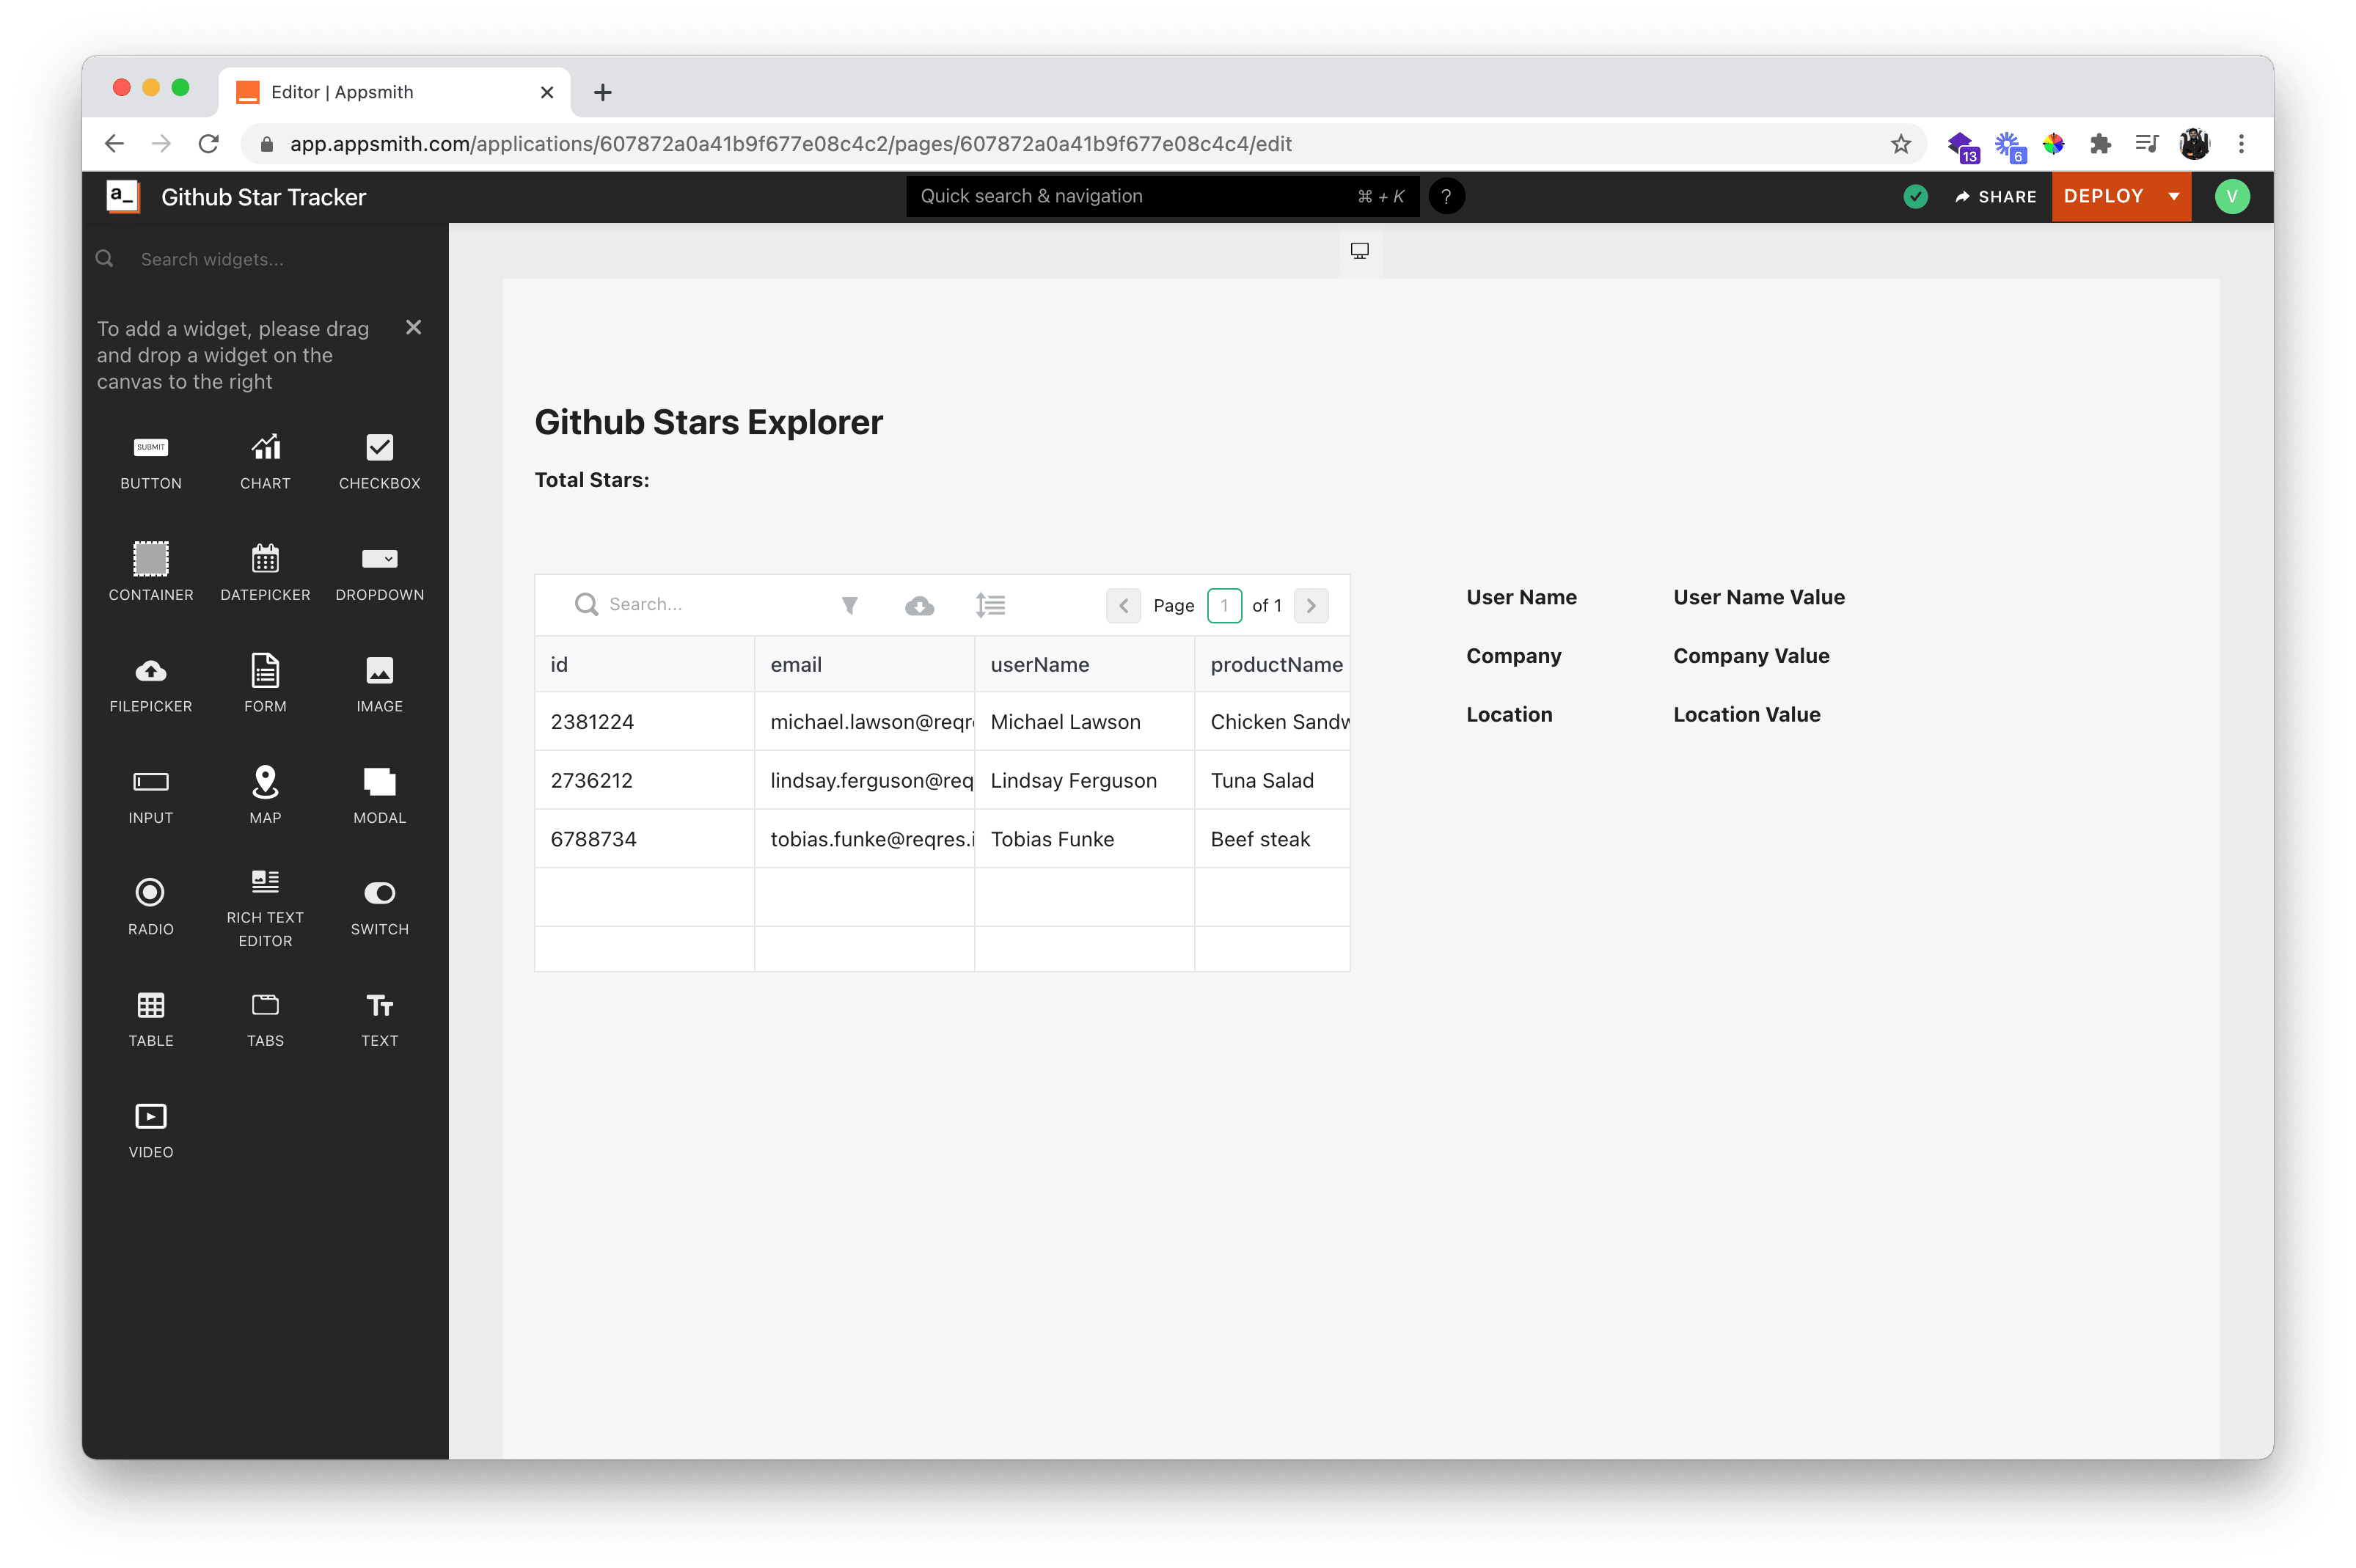
That's it. We have a view. Now we need to bind data to the widgets. Displaying User Data in the Table To display data in our table, we need to bind the widget with a data source. This involves two simple steps, and an optional one for more control on what we'd like to display:
Create an API call to Github that returns the list of users who have starred the repository
Bind the API to the tableStarred_Users
Transform the data using Javascript as necessary
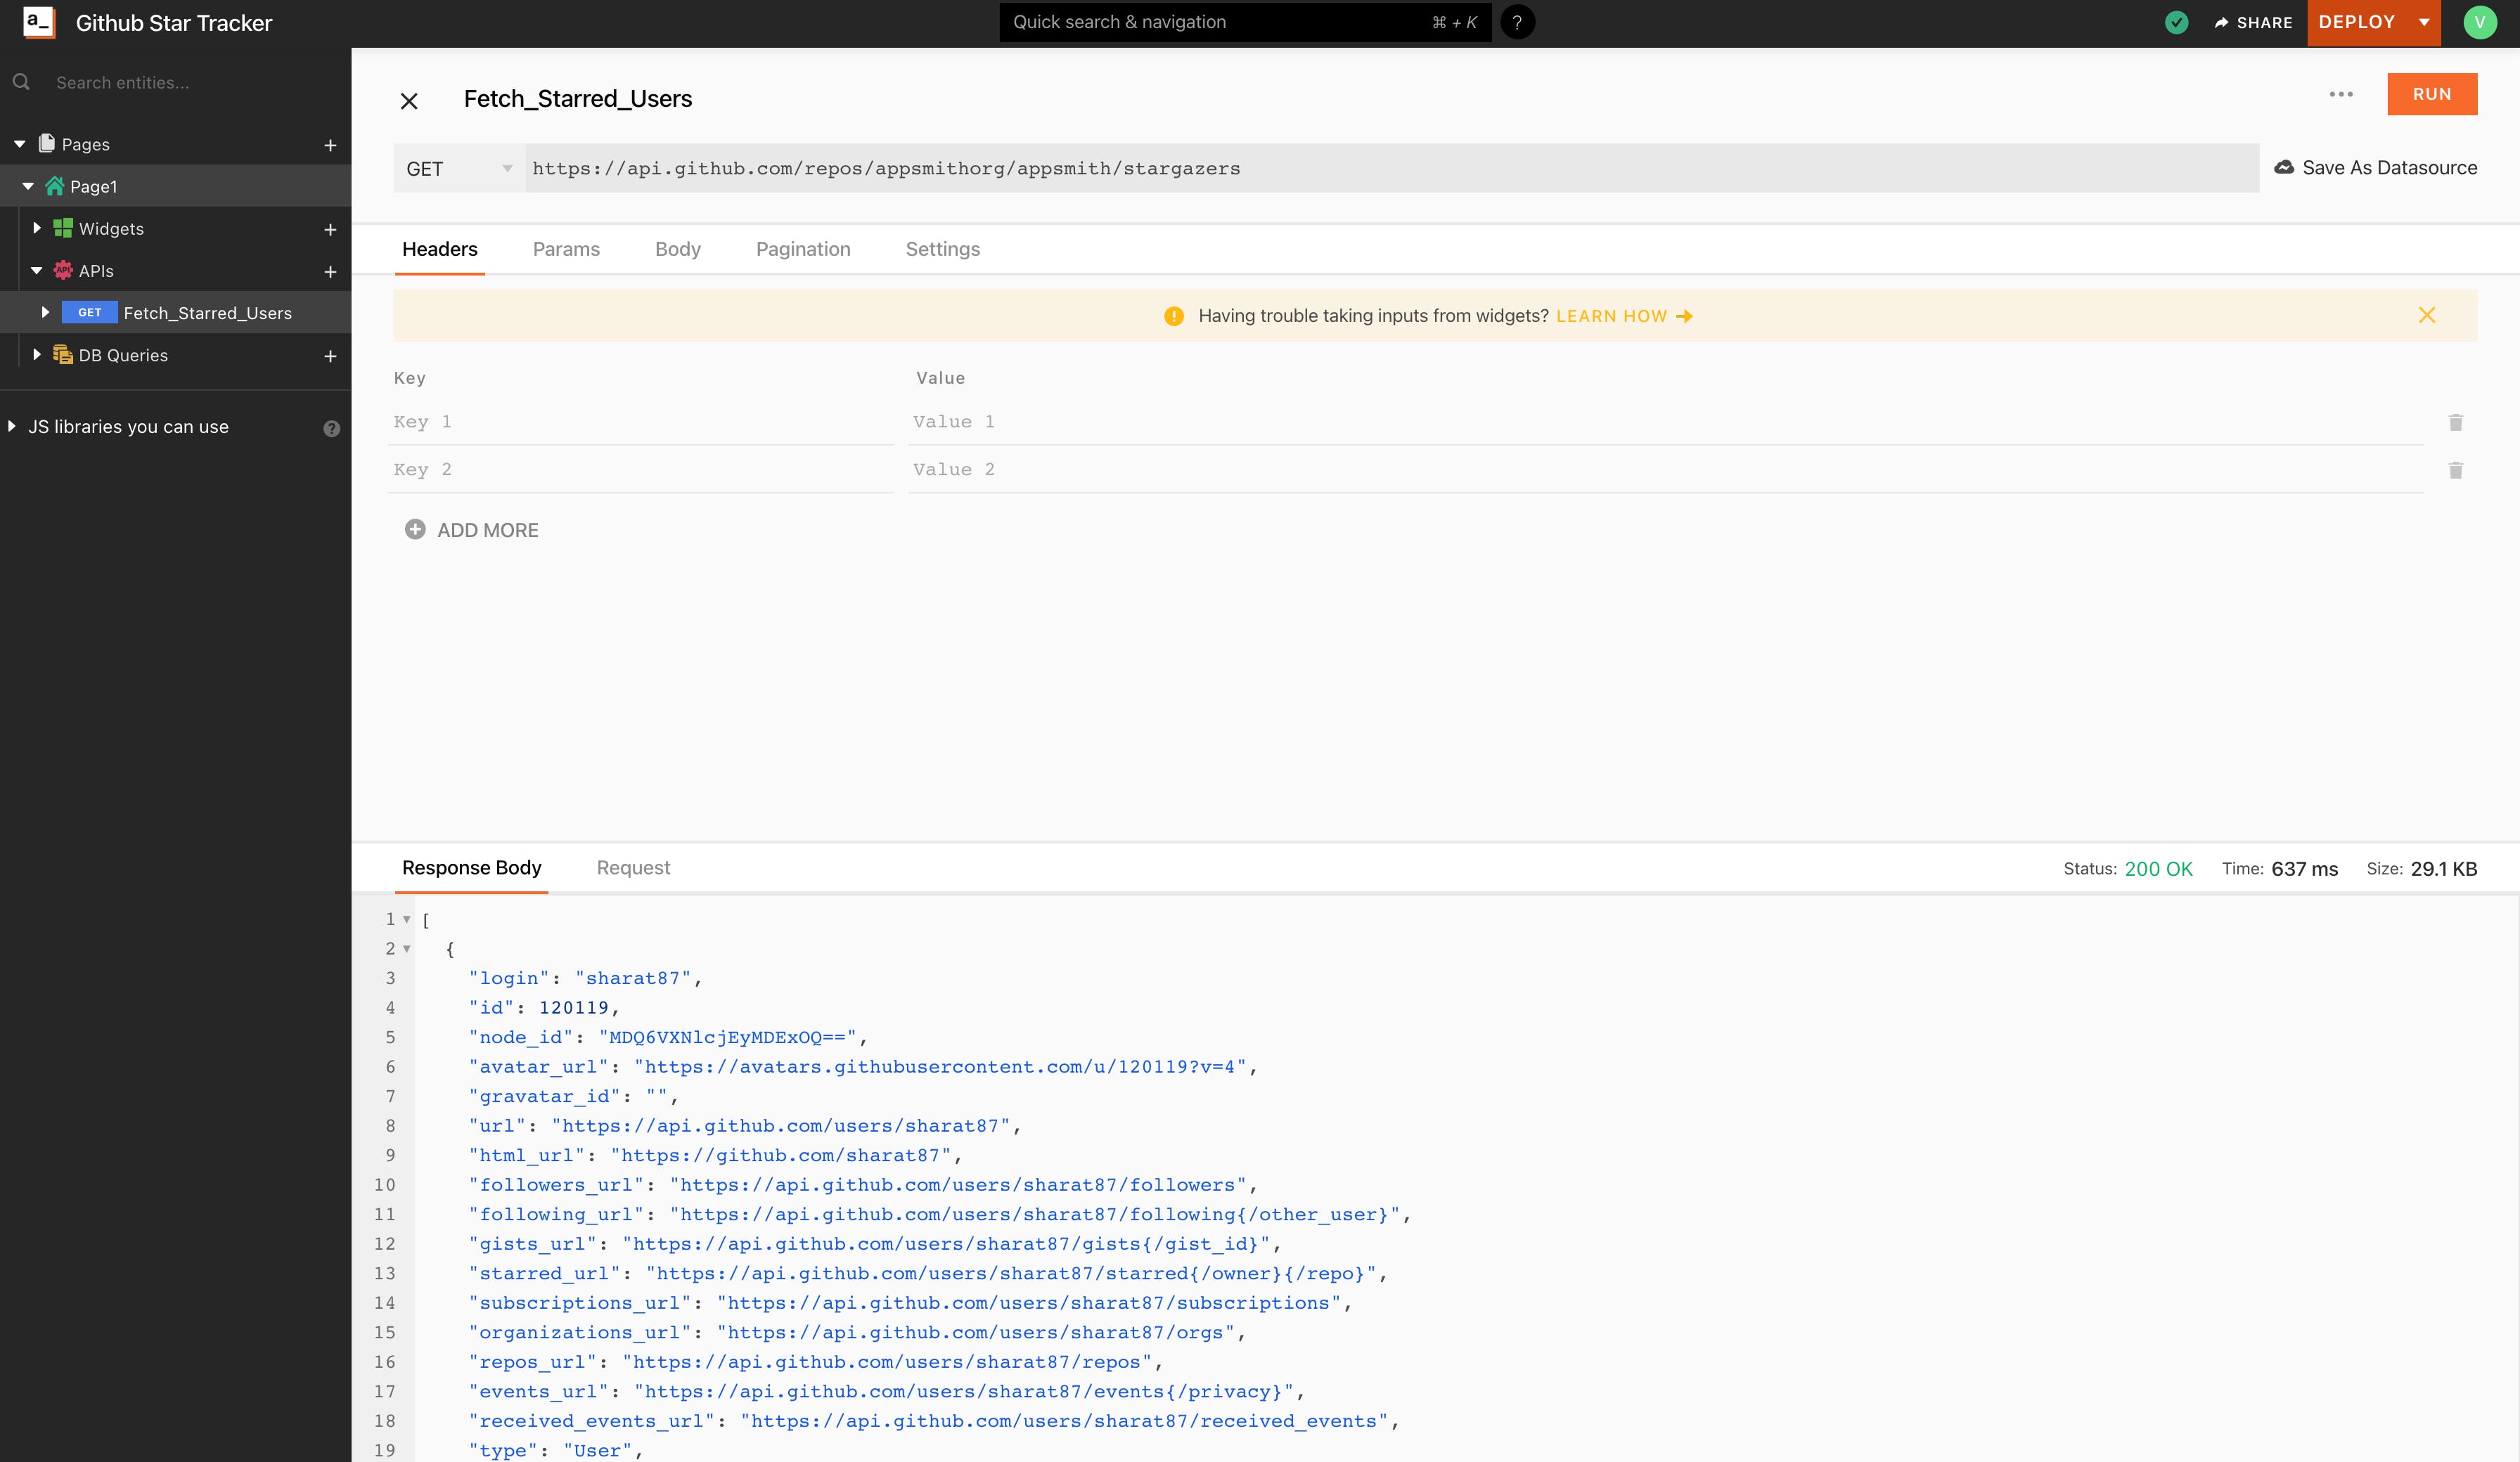
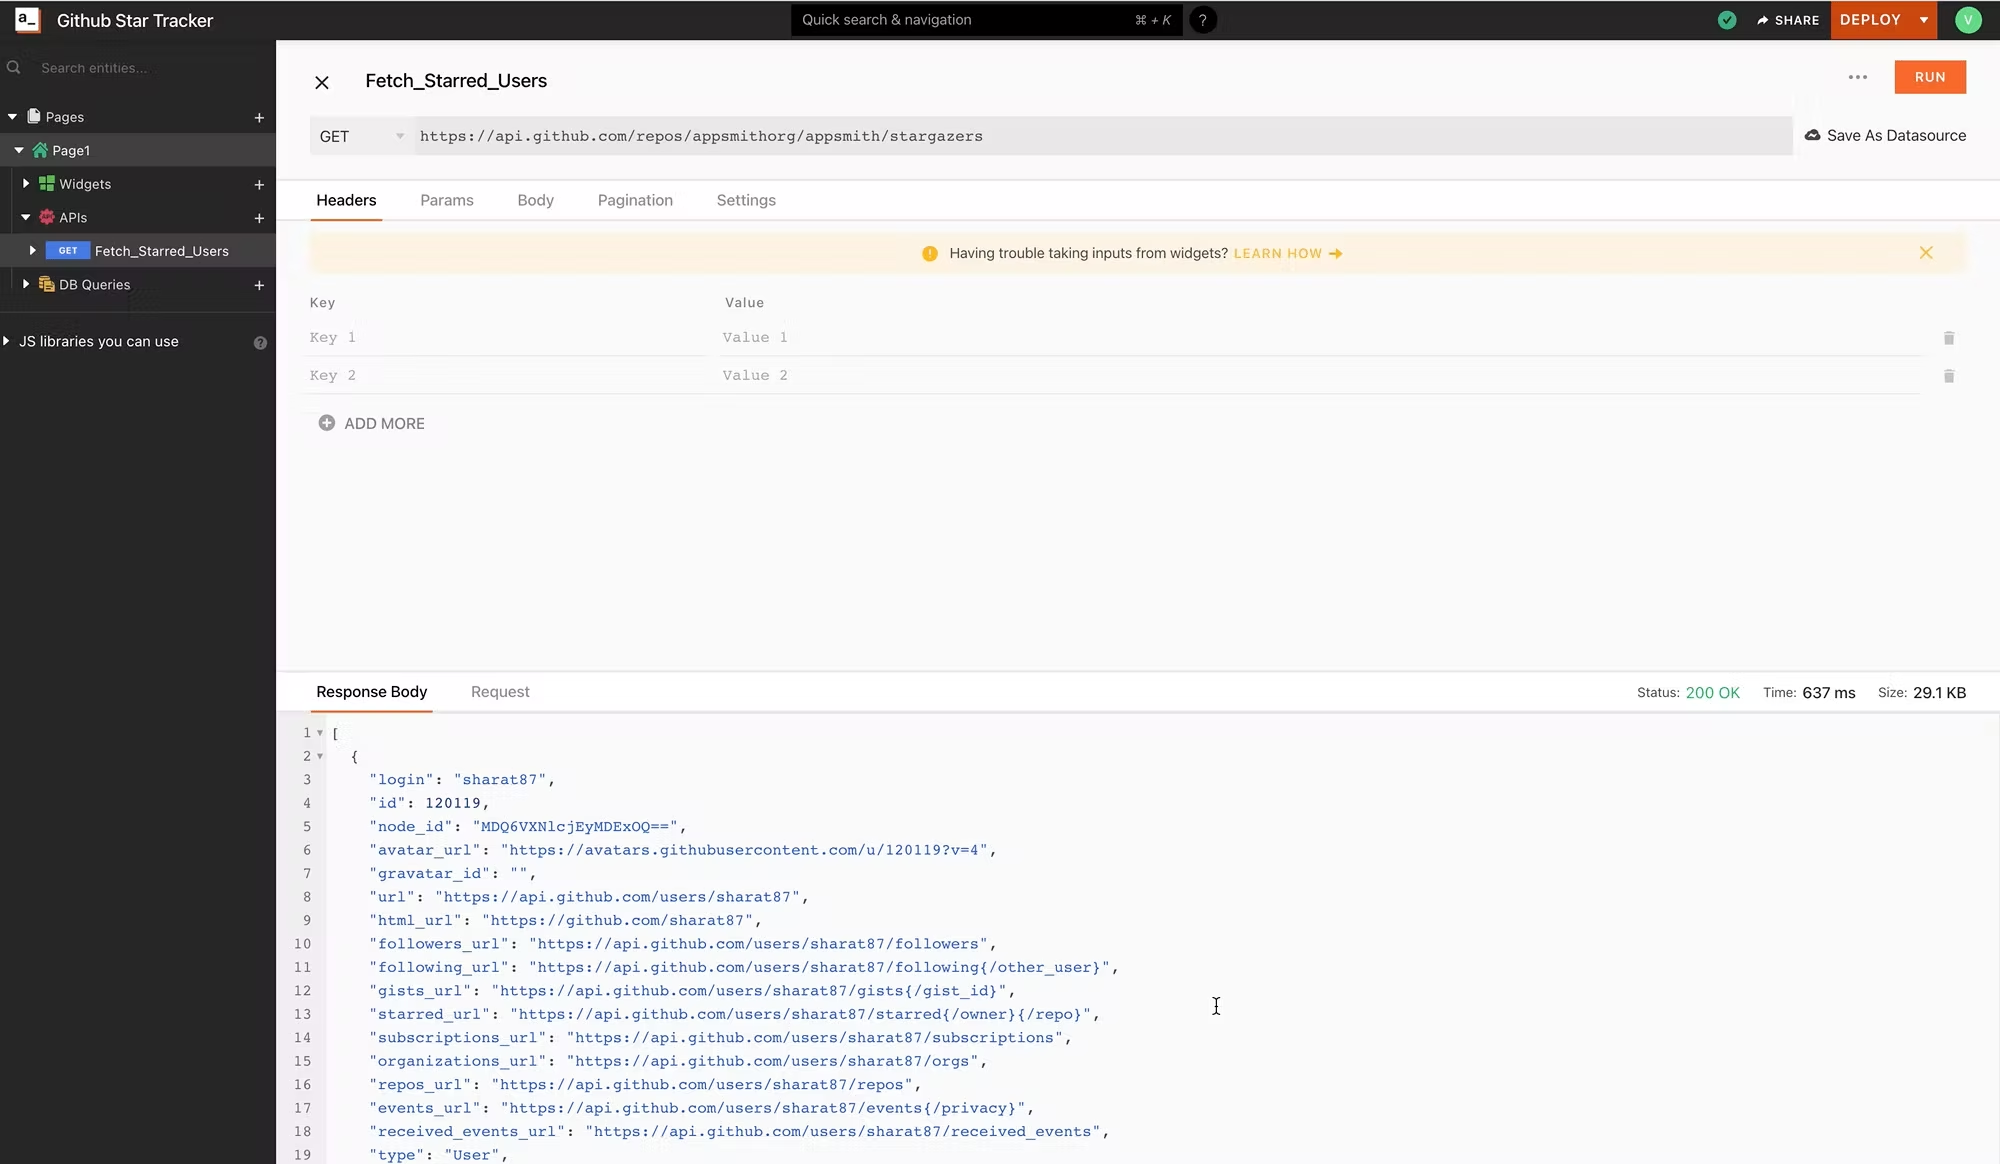
Let's start by setting up the GitHub API, We will use the public Github API endpoint, which doesn't require authentication, through a GET method from appsmith. Now click on the + icon next to the APIs section on the sidebar and click Create New. Let's call this API Fetch_Starred_Users in the URL request input, the method is GET and we will use the URL constructed from Github's API documentation.
https://api.github.com/repos/appsmithorg/appsmith/stargazersFor the public GitHub API, we need to add the header telling them we're an app that is accessing v3 of the API and expecting a JSON response. We'll keep the params empty for now, and revisit it once we extend the application.
Accept : application/vnd.github.v3+jsonNow click on run to evaluate the response to make sure this is working fine. Once this is done, this is what your API page will look like.
Awesome, let's bind the API into our table. Binding data to our Table In the table widget, click on the settings icon, and in the table data field, we remove the sample data and instead fill in:
{{ Fetch_Starred_Users.data }}Appsmith uses moustache to process Javascript, and thus in any input, content in between the {{ }} is evaluated as a Javascript. The table widget expects an Array of objects as its input, and automatically displays it. We can immediately see the table populate. Appsmith interprets changes in real-time and reflects the state, making it much simpler to build the apps.
We now have a table that displays a list of users who have starred our repo. But as you might have noticed, there's a lot of unnecessary information in the response for our viewer. We'll transform this data so we just see the username of the user. Transform Github Results to Display Login Details We can use native JS to transform data in Appsmith. In this case, we will use the map function to remove unnecessary data that is returned, and only display users and their logins. In the same table, we change the earlier moustache content to:
{{
    Fetch_Starred_Users.data.map((row) => {
      return { UserName: row.login };
    });
}}
We can see how that instantly changes the display here. We can also extend this and display what you'd like to display relevant in your app. And that's it! We now have a view that calls an API and displays relevant data to users. But how do we go from here and display user data? We'll do that in the next section. Going from View to App Right now, our application doesn't have anything but the placeholders to show basic profile data. We're missing multiple things:
No API to fetch profile details
Connect table click to profile details
Display profile details after API runs
Paginate the API and get the full list of user profiles
Now, let's fix them starting with setting up profile API. Setting up the Profile API Github offers a very seamless way to access user profile details through their API. From their API resources:
https://api.github.com/users/{{"Username of User"}}The {{Username of User}} is a variable that we need to share with GitHub to respond with the right response. We can do that in Appsmith by using Moustache and passing it as a parameter to the API. Let's create a new API called Github_User and in the URL we have a GET request with the following parameters. Appsmith offers an intuitive selectedRow method for us to pull relevant data from the view.
https://api.github.com/users/{{Starred_Users.selectedRow.UserName}}Our API should look like this after clicking on run.
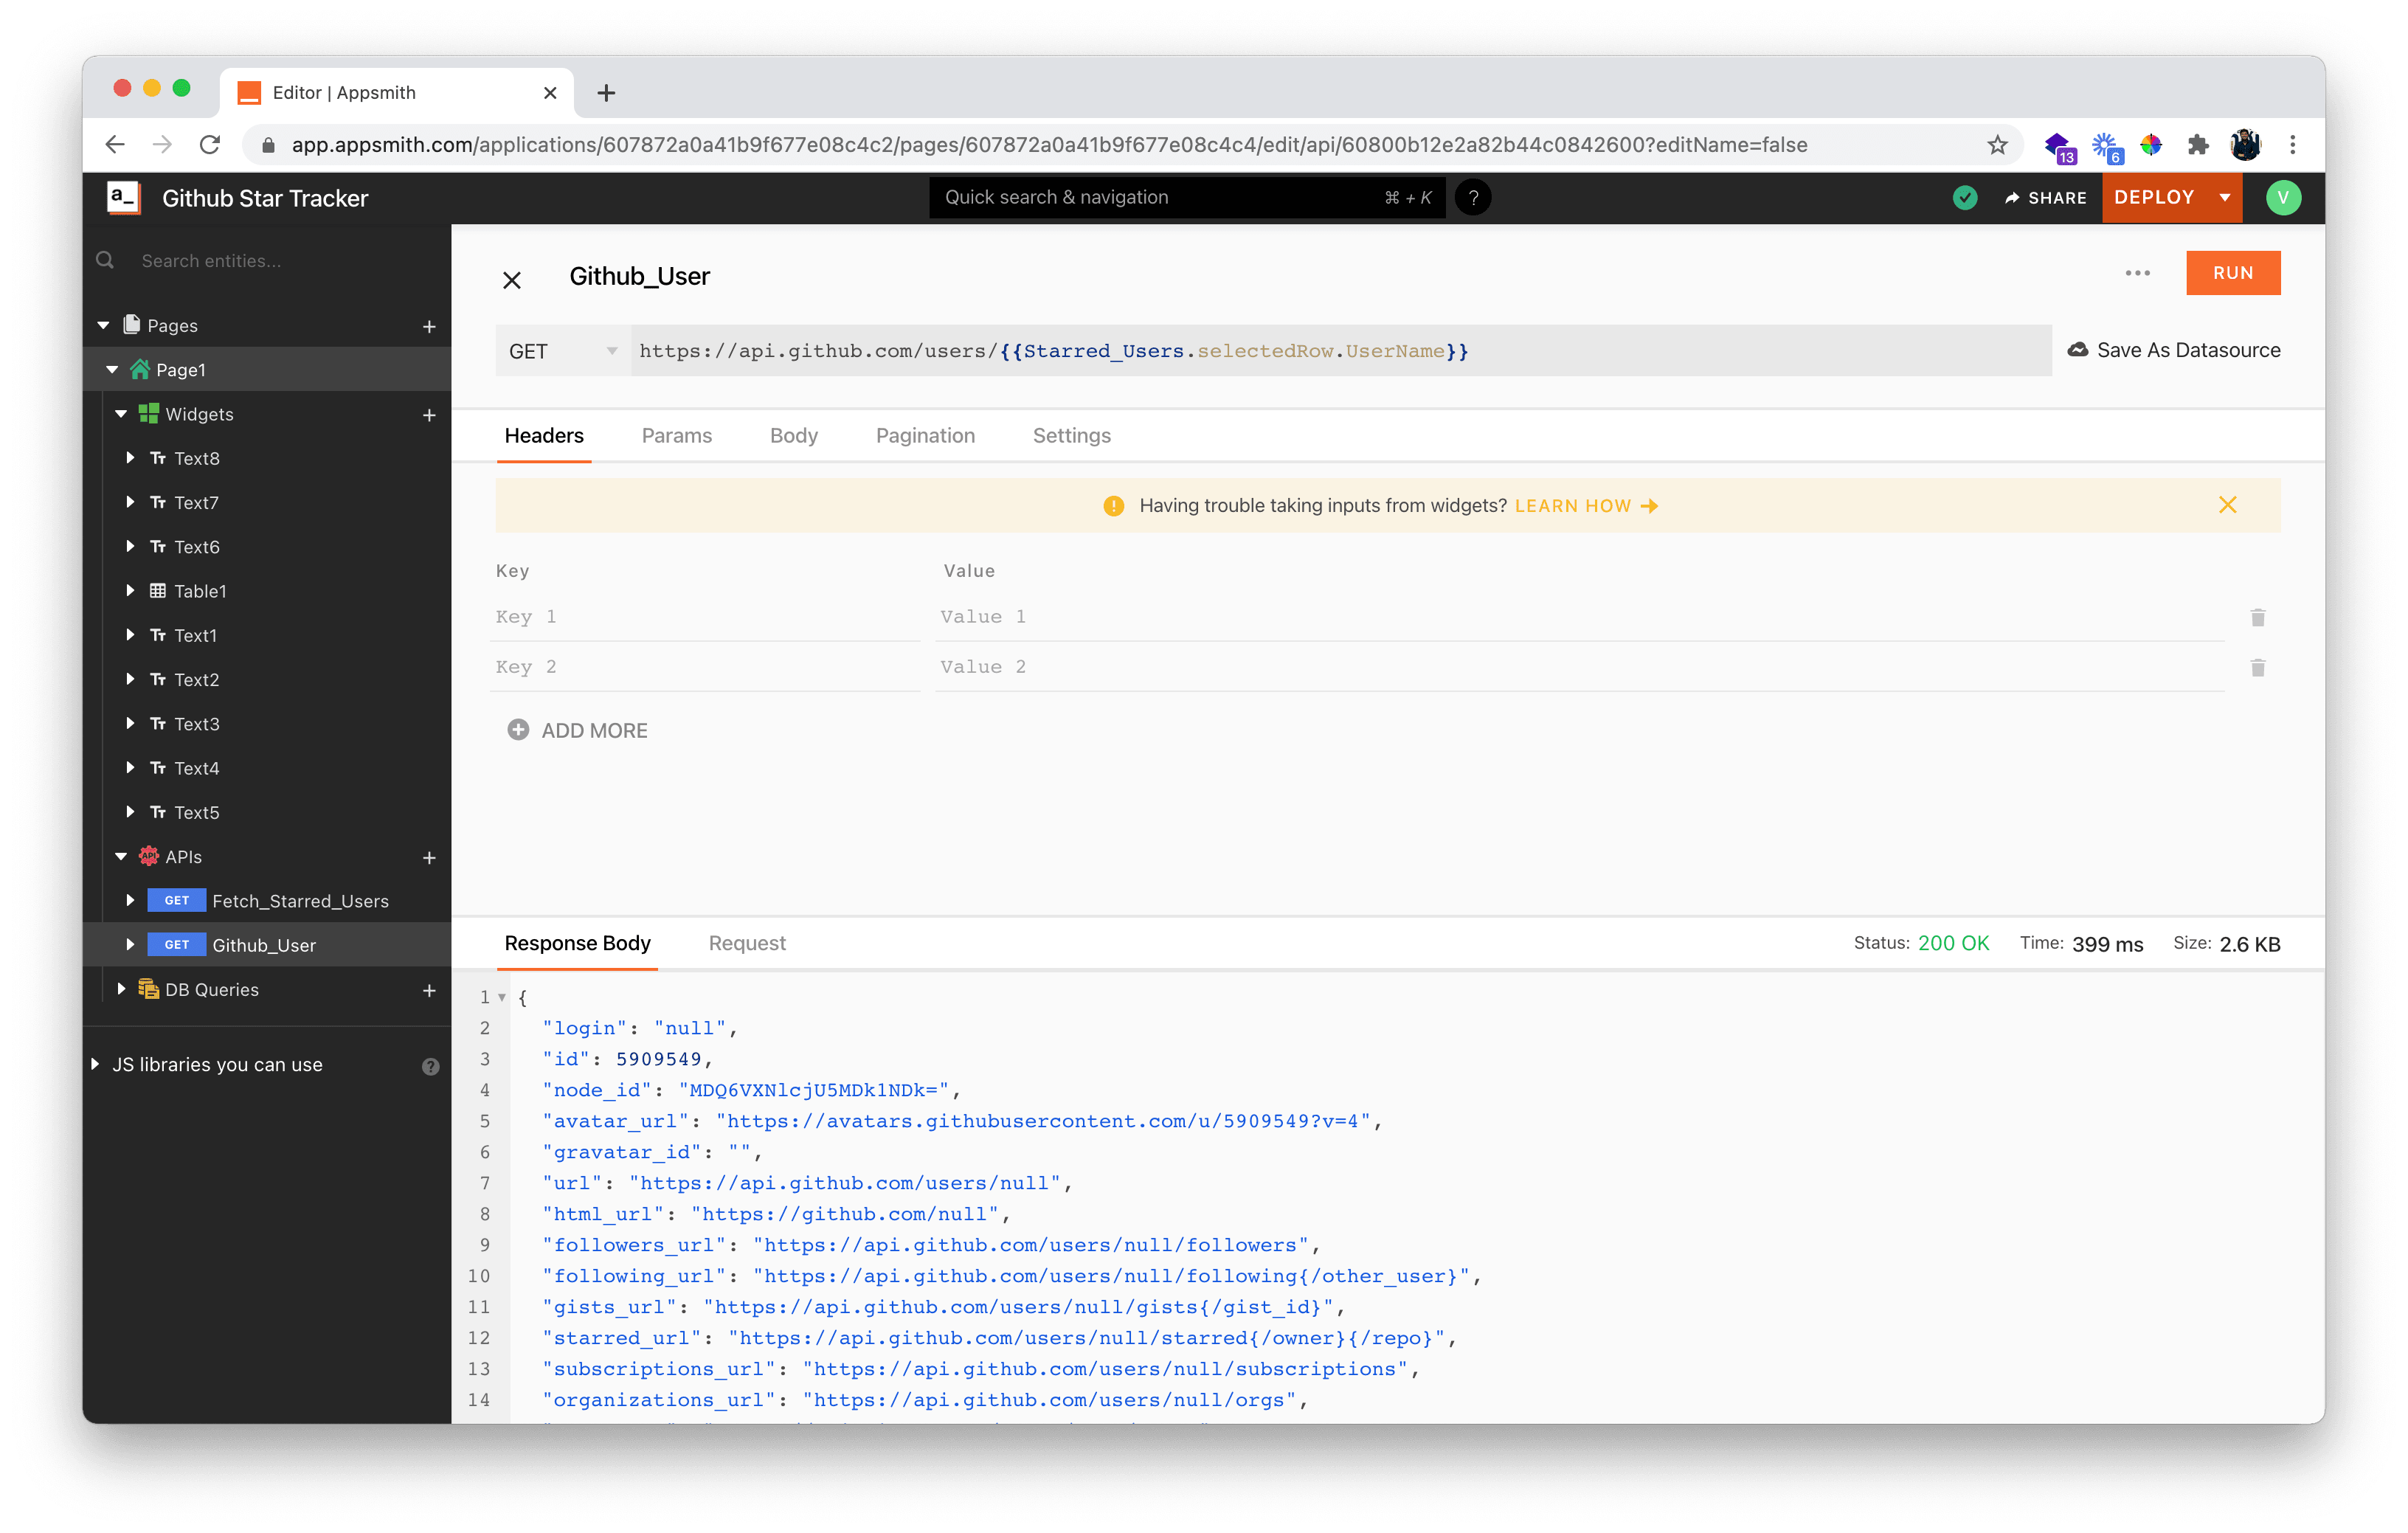
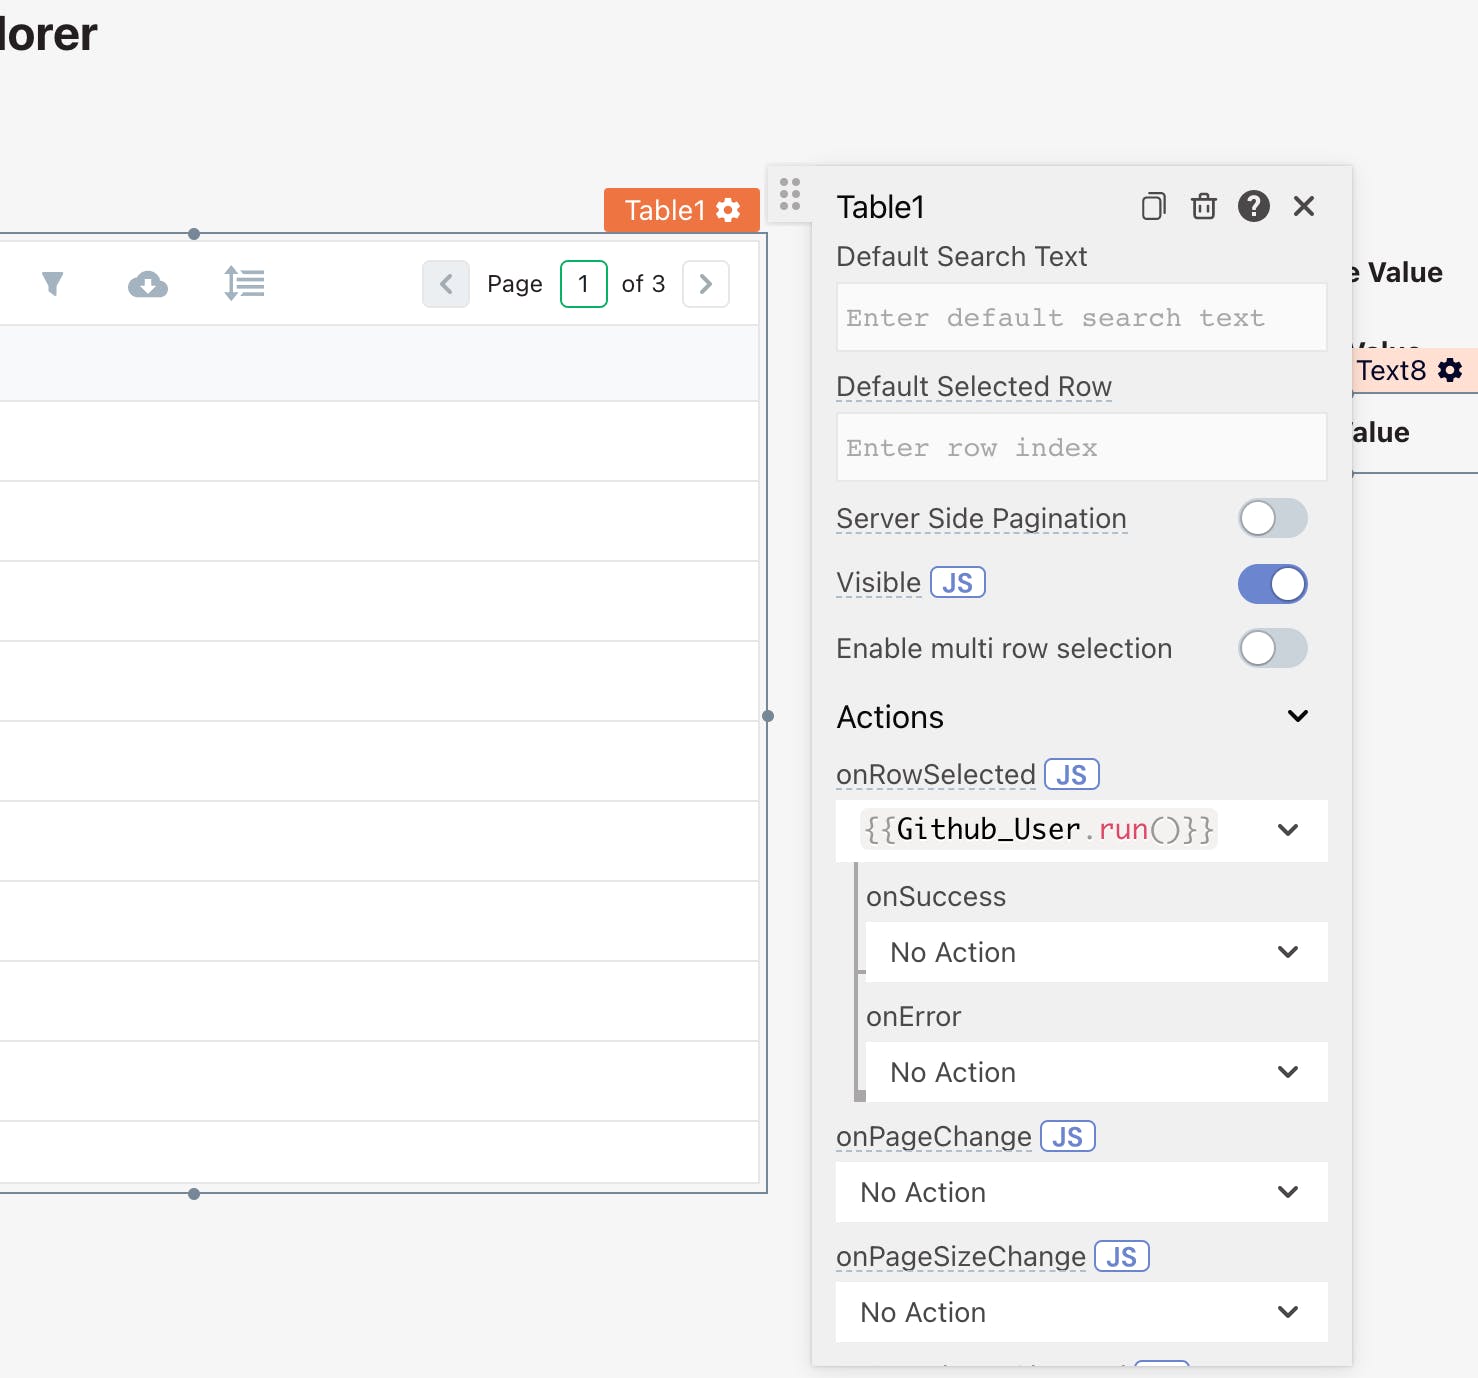
Now with the API in place, we need to modify the view to show the data that the API returns. But before we work on the view, we need to make sure that the API is called whenever somebody clicks on a table-row. Appsmith has an inbuilt property that does just that. In the Table widget settings, update the onRowSelected field to run the Github_User API.
To update text in the user profile text boxes we'd created before, change the placeholder text from User Name to:
https://api.github.com/users/{{Starred_Users.selectedRow.UserName}}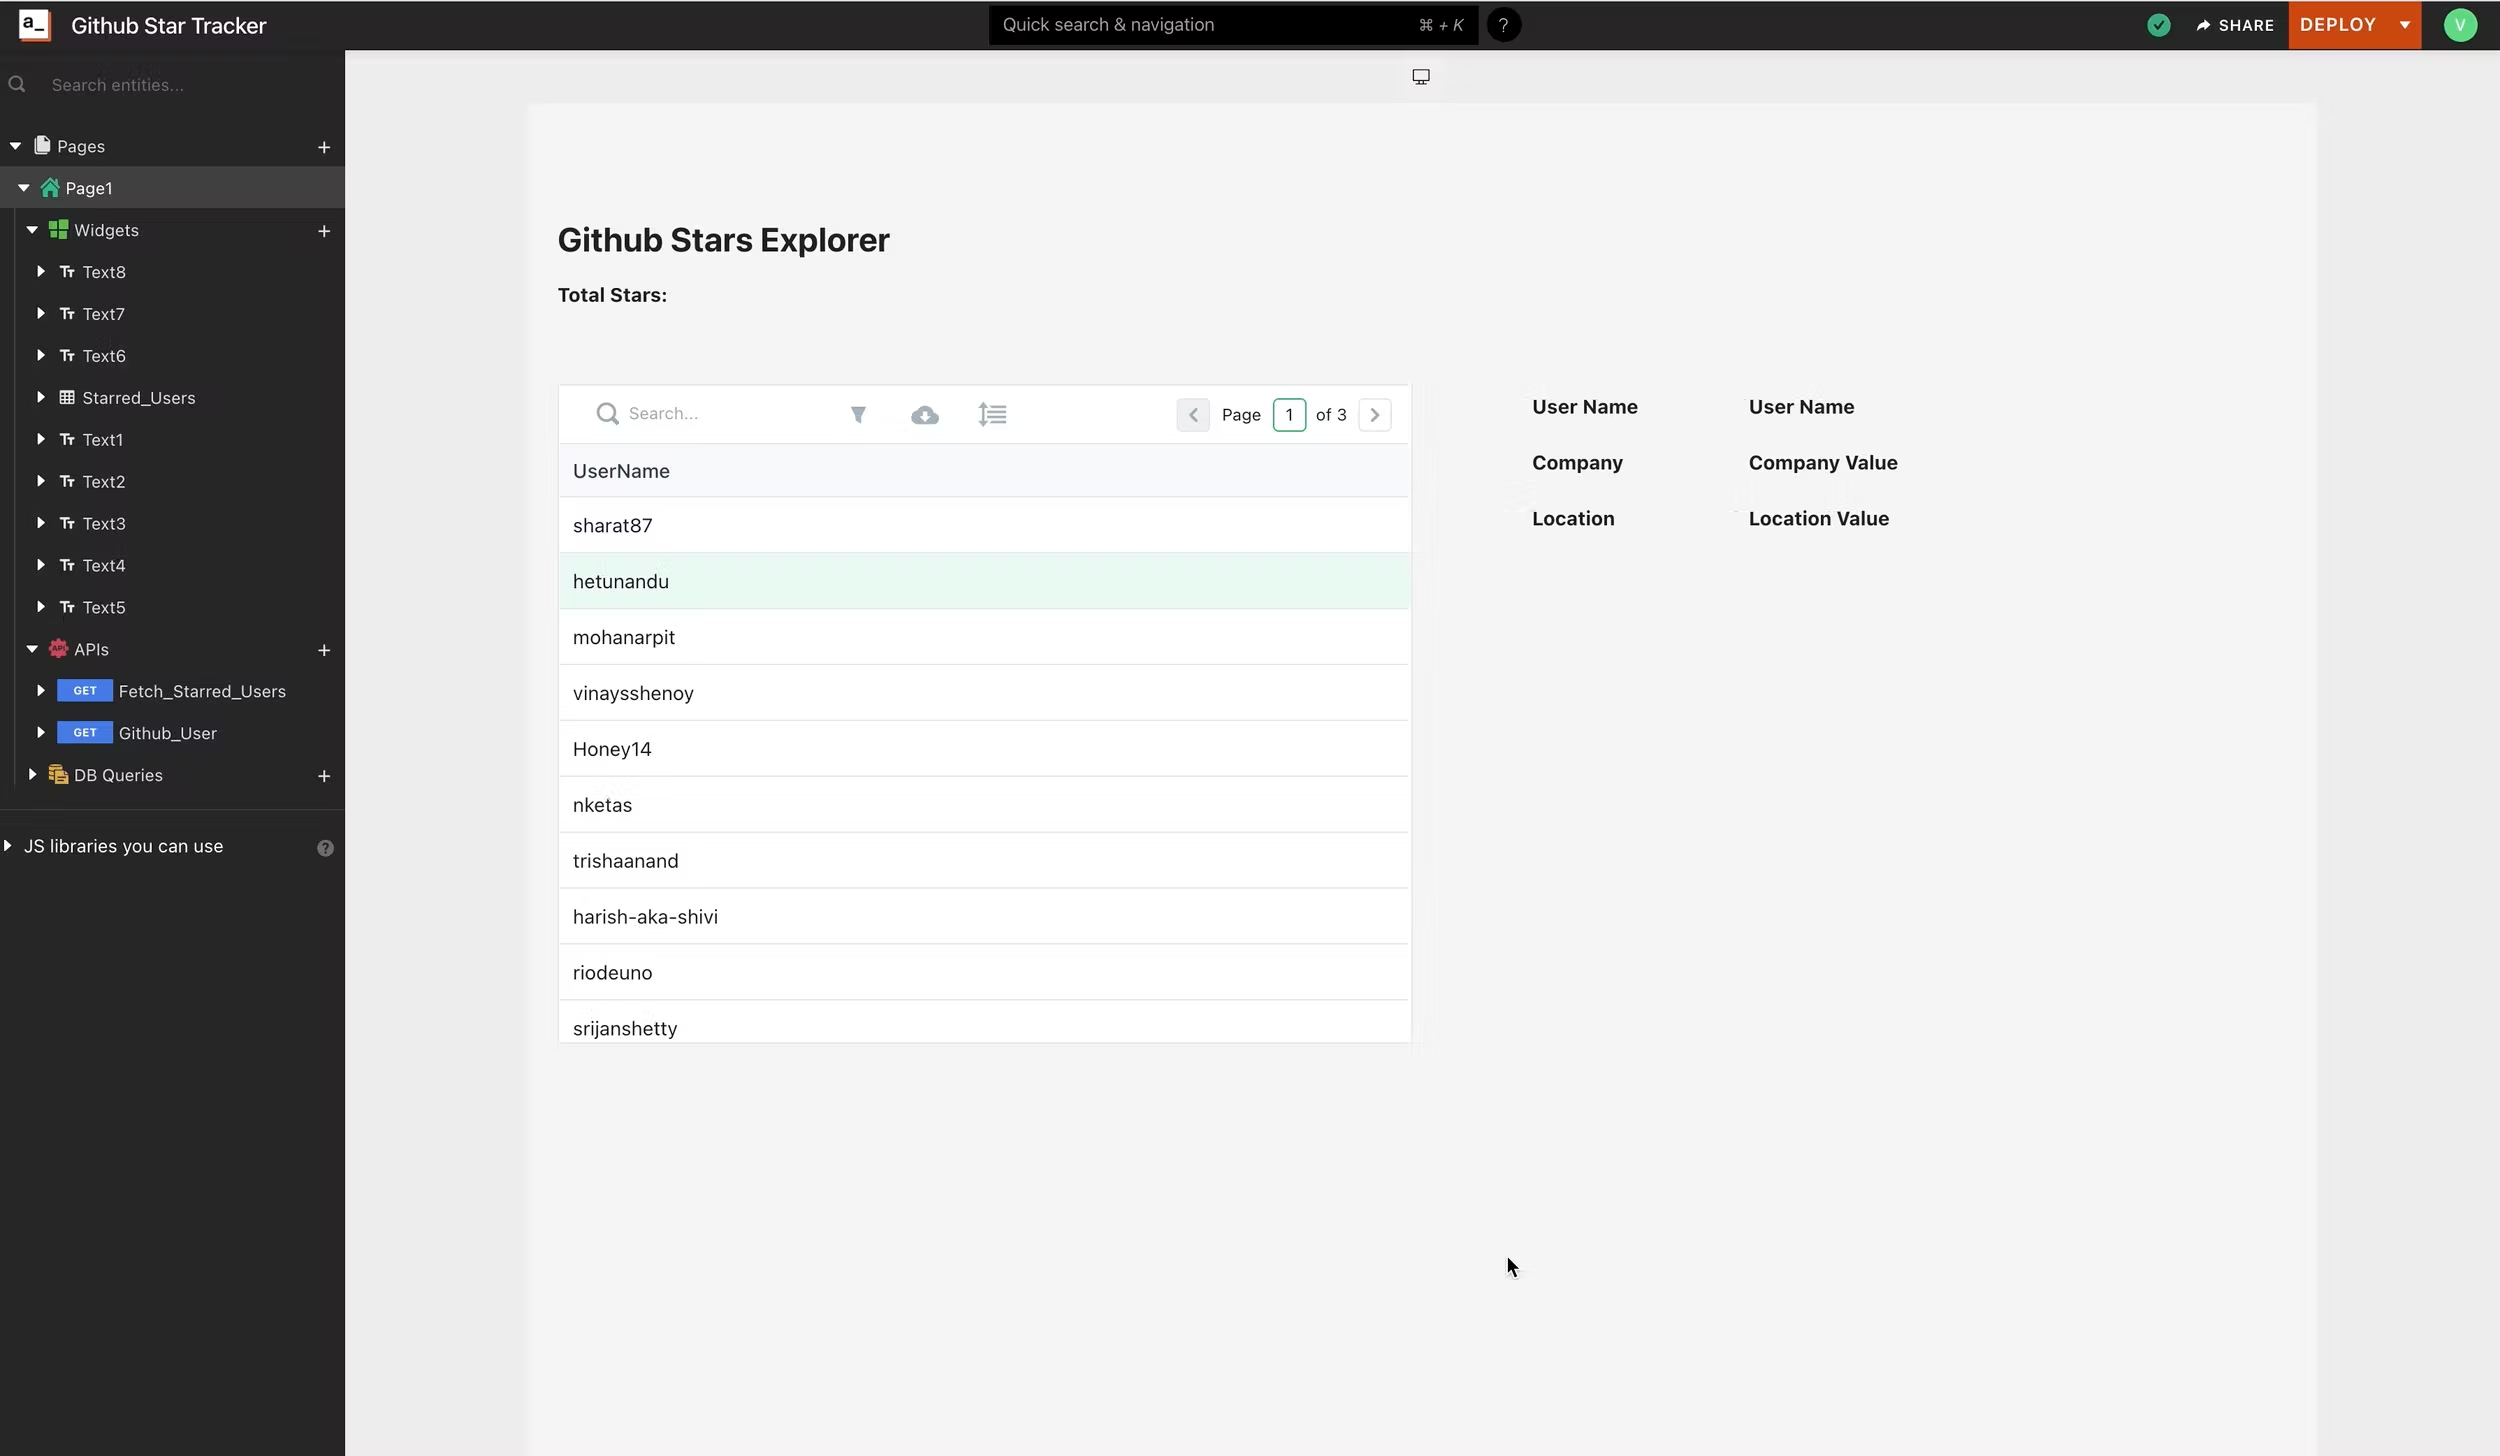
Repeat that for the rest of the fields and we'll have something that looks like this:
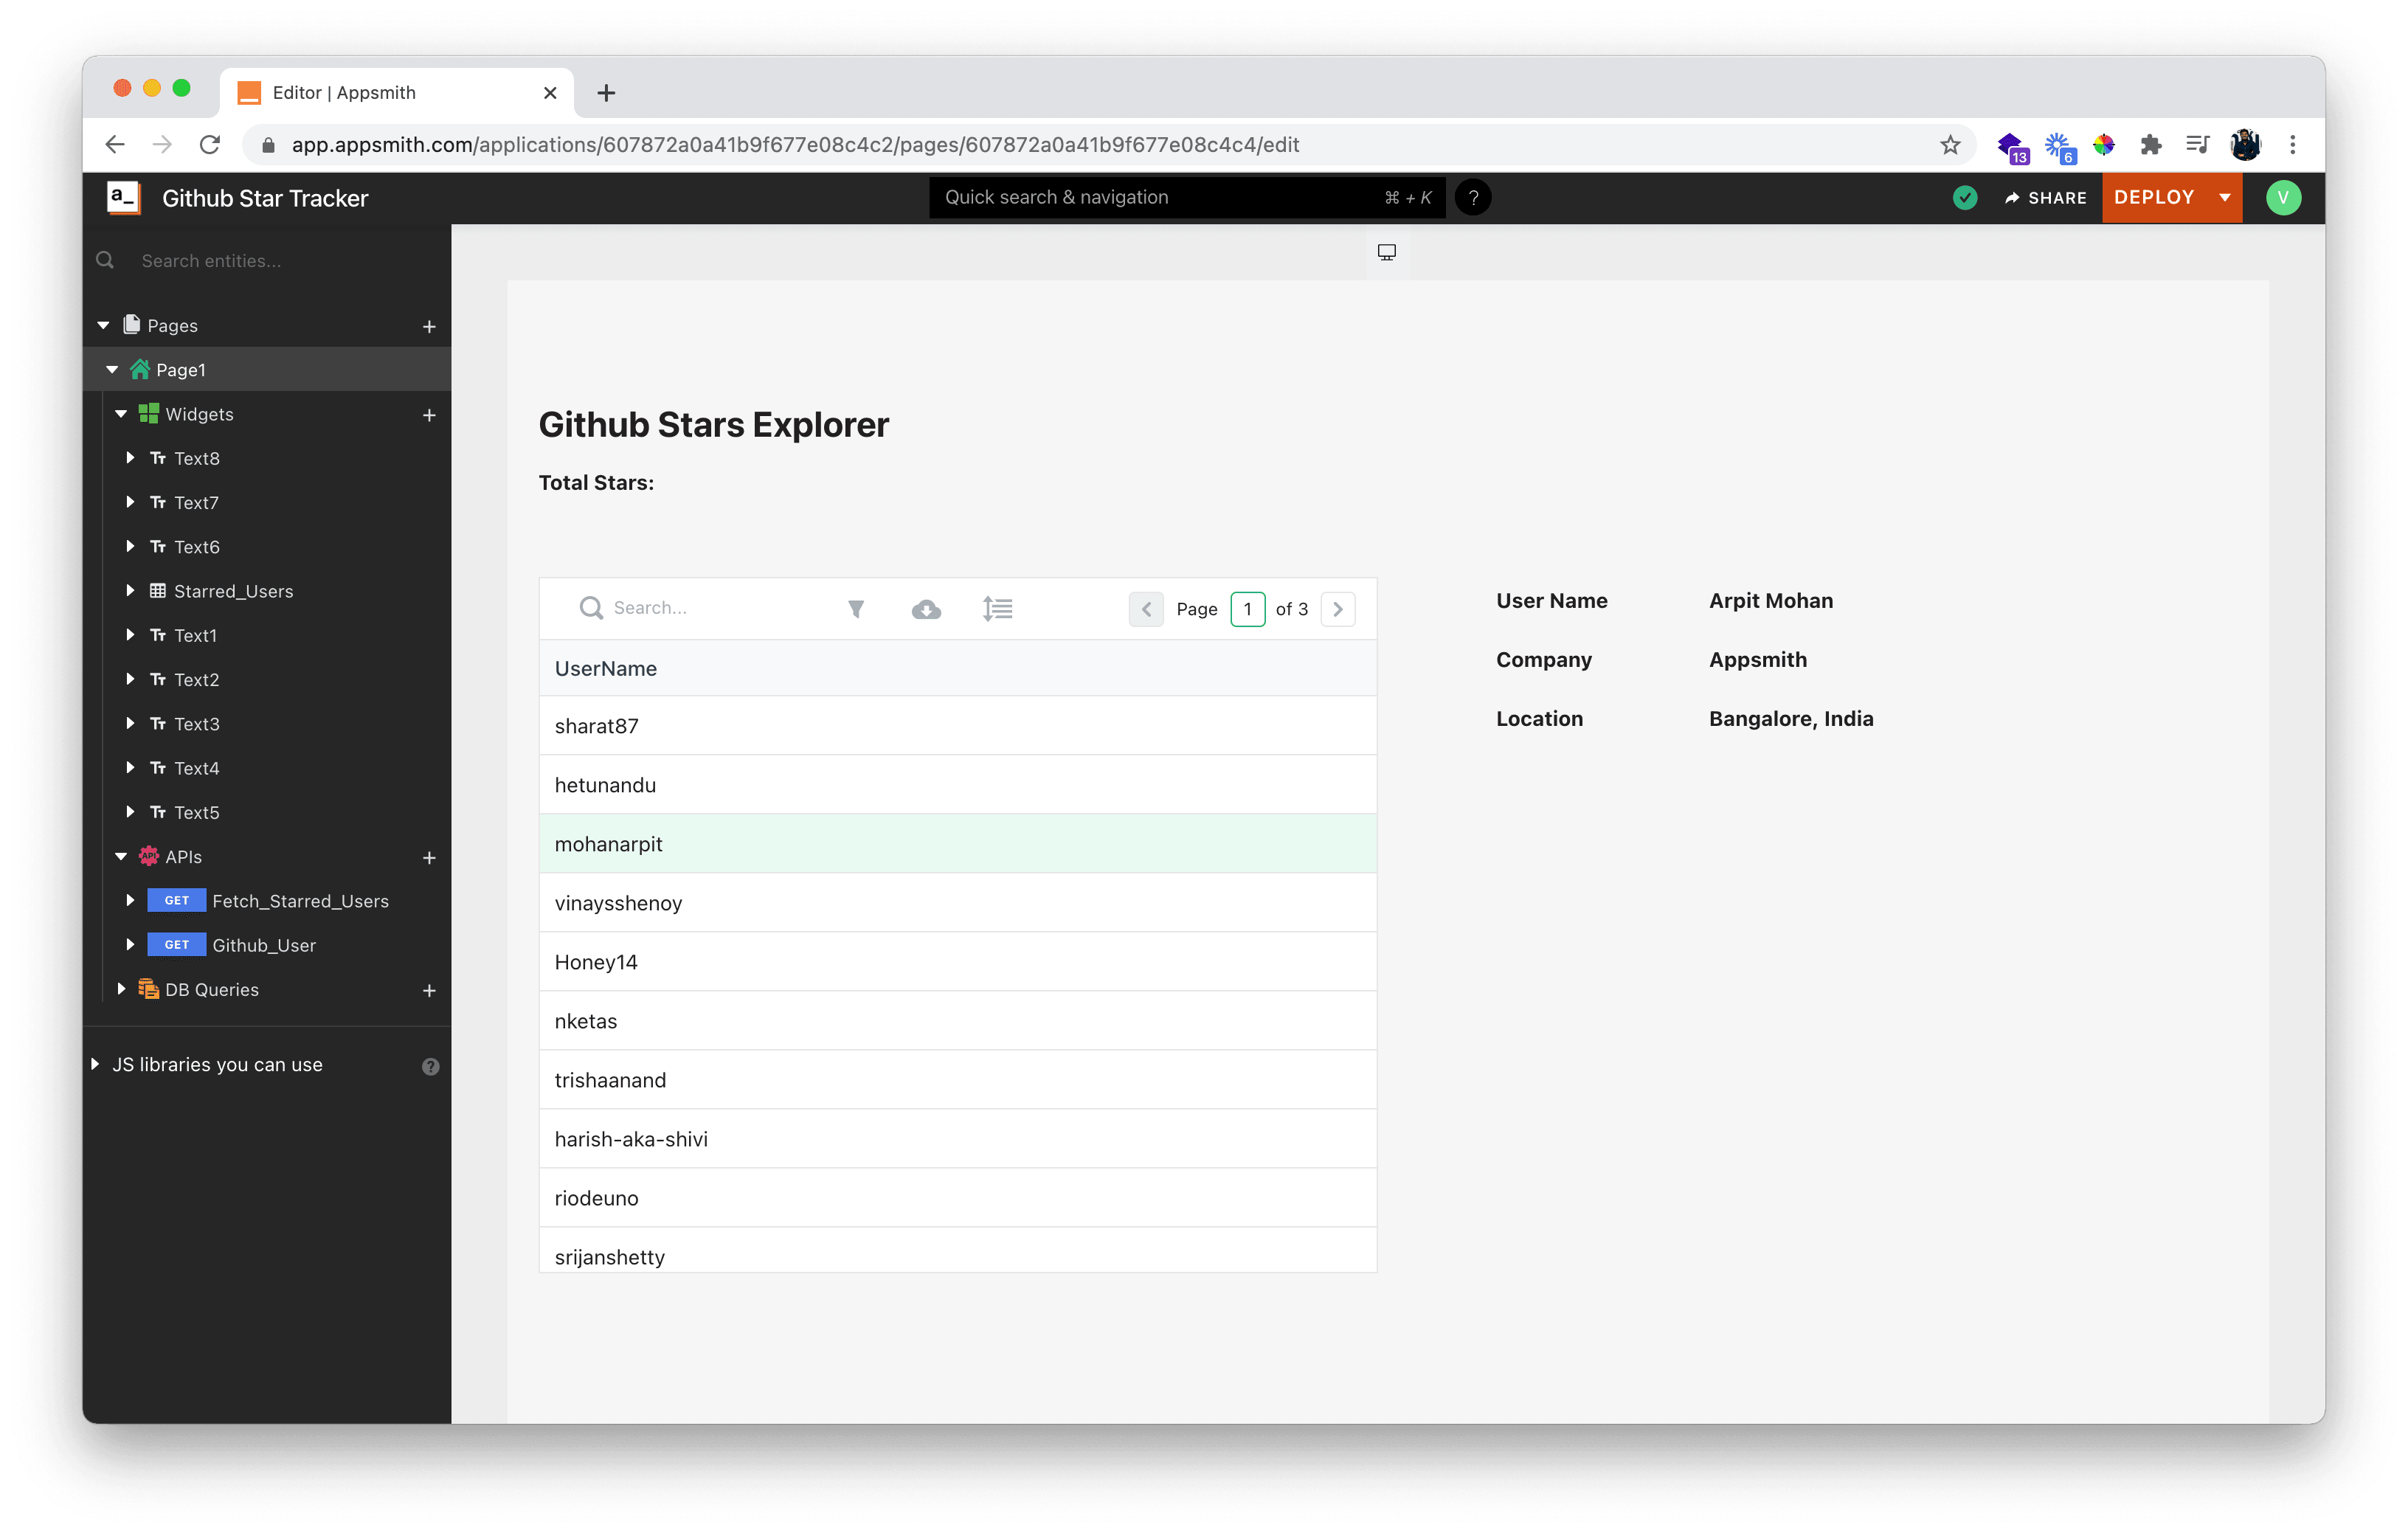
Now we're able to click on a row essentially, and we'll immediately see the profile basics of the person who has starred our repo. The Github API responds with only 100 profiles, and we'll have to paginate the rest and request this data each time. Appsmith lets us do that smoothly. Paginating Github Response to Pull Profiles To start paginating, we must enable server-side pagination on our Table. This will help us programmatically call the pages to Github and get more responses.
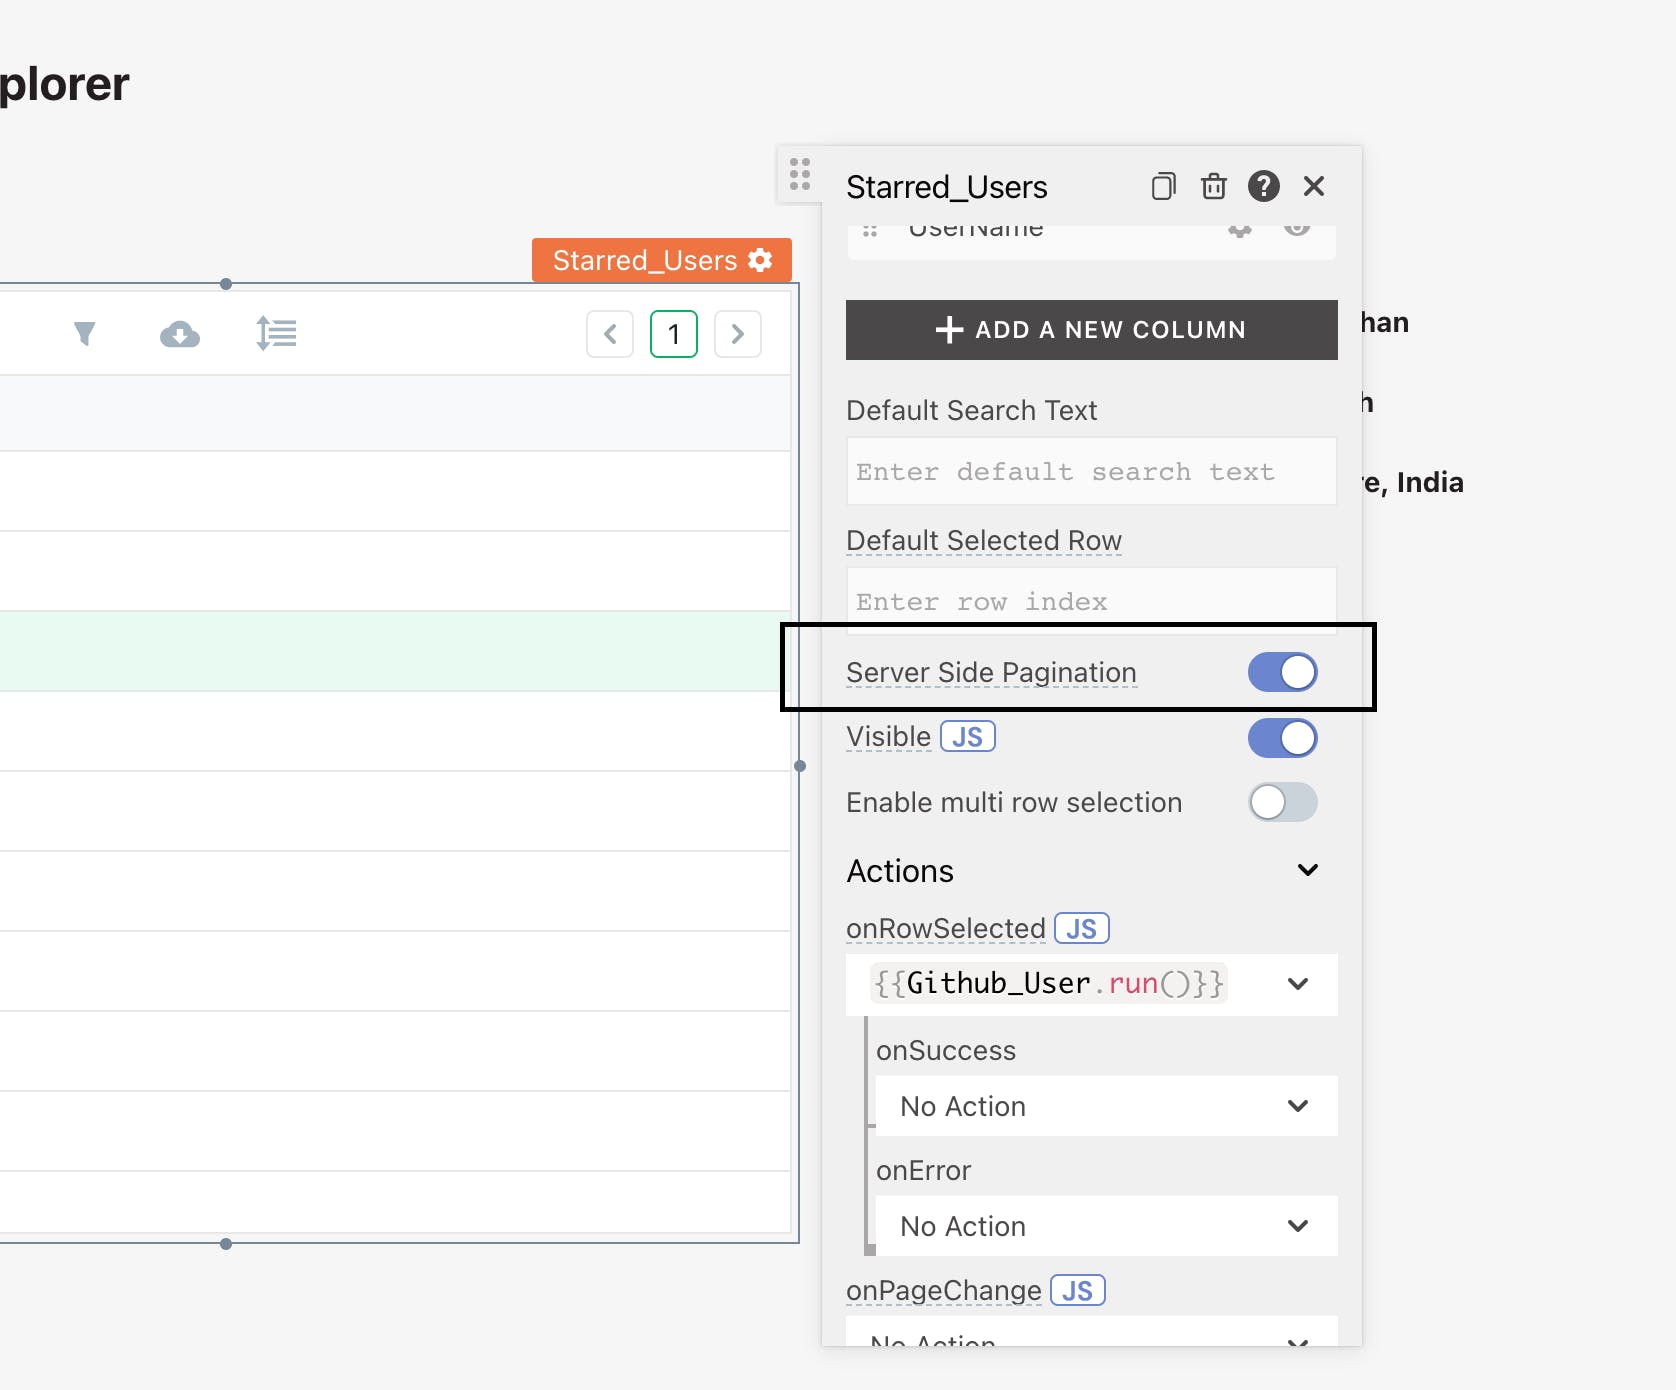
With this enabled in the Fetch_Starred_Users API, we'll need to pass the page parameter, as described in the Docs. In the API screen, we add the page parameter to the request:
page : {{Starred_Users.pageNo}}The final API page should look like this:
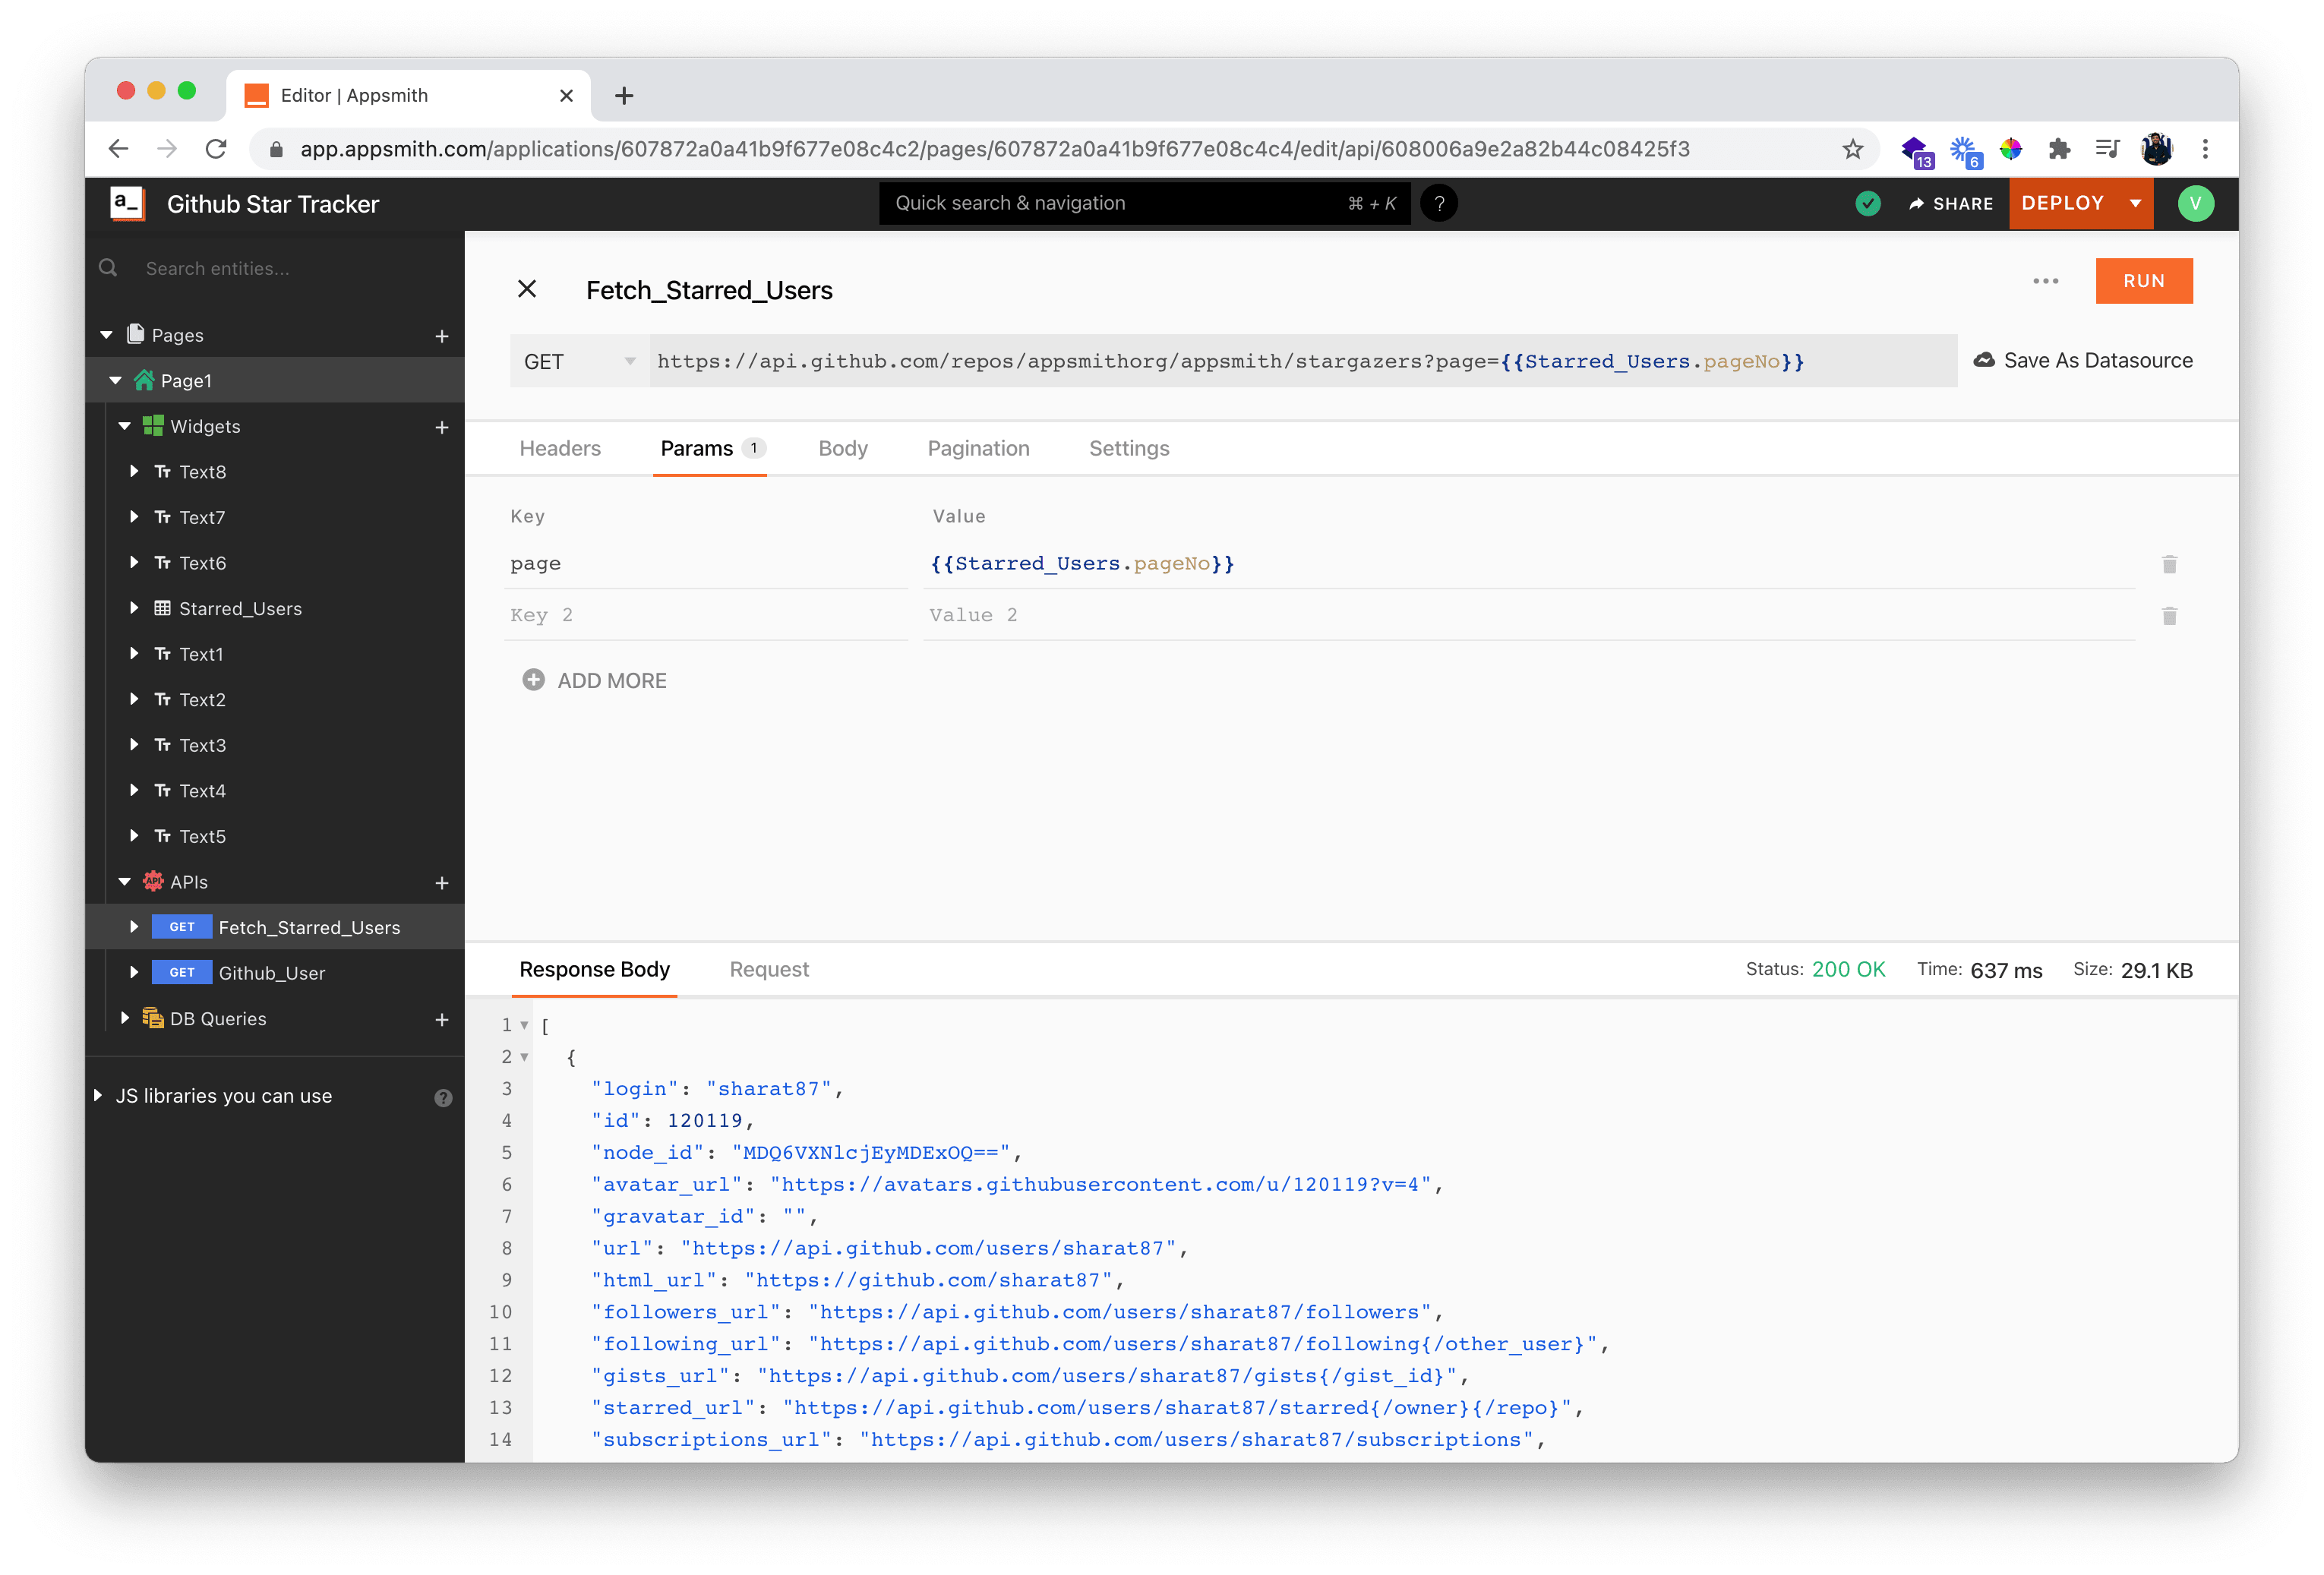
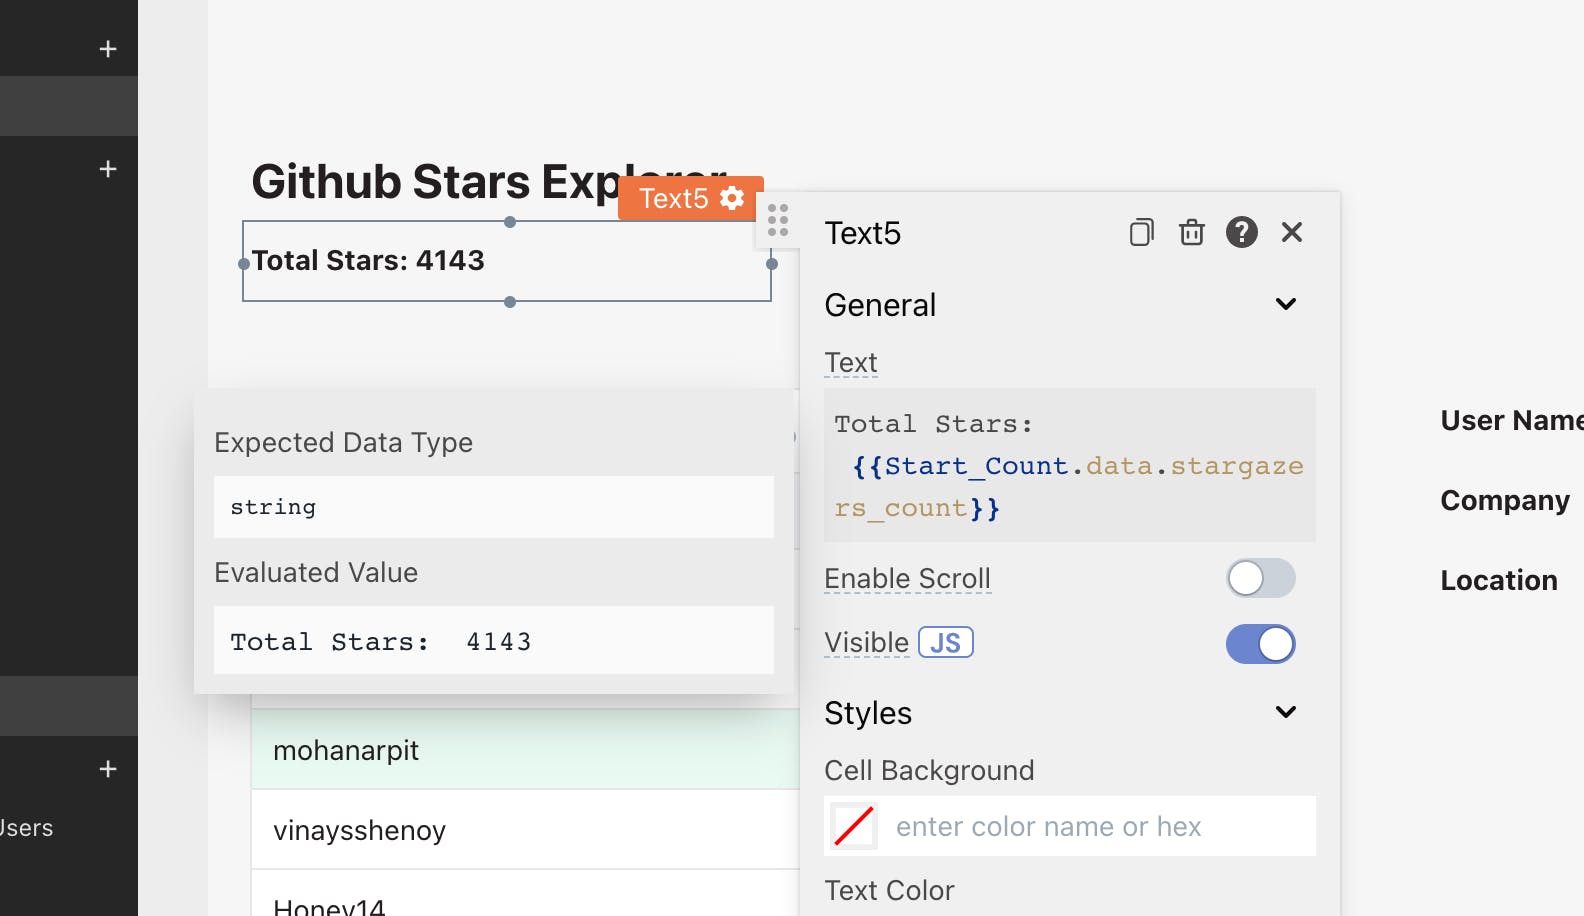
Now we go to the app and check if our pagination is working, and that's it! We now have a full-fledged application that pulls data from Github and helps us see who and where the users who have starred our repo are from. Lastly, let's add an API that fetches the count of Github Stars for the repo, for this let's create a new API and name it as Start_Count. Add the following URL in the input box:
https://api.github.com/repos/appsmithorg/appsmithThis URL will have the attribute stargazers_count from which we can get the count of the total number of stars on the Github repo. Now let's bind this variable on the text widget on our Page. Below is the screenshot:
Wrapping Up
Deploy your application on the cloud and share it with others, and that's it. We're done! If you are more adventurous, you can extend the app to set parameters on how many users you want per query and have an input form that helps you dynamically check and explore user profiles of starred users on any repository. We have made a slightly more robust application public here; try it out and let us know what you think. You can also check the live demo of our app here. If you have any questions or feedback, join our discord, or write to akshay@appsmith.com Cover Photo Credits: Photo by Markus Spiske on Unsplash
Related Blog Posts
